Configure the external tool in a course/project
There are two ways to configure external tools in Sakai. One can follow either For all courses/projects section or For each course/project
For each course/project
Now it is time to configure the external tool to a course. To do so one has to follow the following steps:
Click on Site Info in the left panel and then click on External Tools in the top menu.
Click on Install LTI 1.x Tool link, which is in the top right corner of the page.
-
Provide the below mentioned fields to configure the LTI tool:
Tool Title: The name of the tool
Button Text: The name of the button
Launch URL: The launch URL when the tool button is clicked and it should be https://lti.sensusaccess.com/Home/Index.
Launch Key: It is the Consumer Key provided by Sensus.
Launch Secret: It is the Consumer Secret provided by Sensus.
One need to check the Send Email Addresses to External Tool in the Privacy Settings section as the tool delivers the conversion result either in Campus email or Download. Click on Save button.
For all courses/projects
There is an alternate way to configure LTI tool globally. To do so follow the following steps:
Click on the Administration workspace.
Click on External Tools in the left panel.
Click on Install LTI 1.x Tool
-
Fill the form with the below mentioned fields:
Site Id: Leave Site Id blank
Tool Title: Give proper tool title for example SensusAccess
Button Text: Any text
Launch URL: https://lti.sensusaccess.com/home/index
Launch Key: Consumer Key provided by Sensus
Launch Secret: Shared Secret provided by Sensus
One need to check the Send Email Addresses to External Tool in the Privacy Settings section as the tool delivers the conversion result either in Campus email or Download. Click on Save button
Click on the Tool Links and in the page click on Create Tool Link at the top right side.
In this page, choose the previously configured tool (SensusAccess) from the Select Tool dropdown.
-
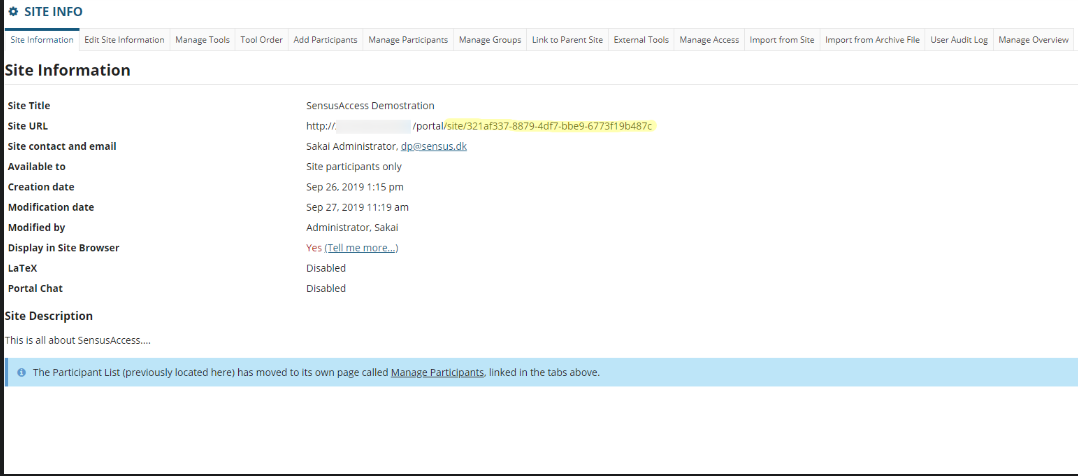
Once the tool is selected in the dropdown, one has to put Site Id. To get the Site Id, one has to go to the Worksite Setup and from the listing click on the project whose Site Id is needed. Now from the left menu, one can click on Site Info.
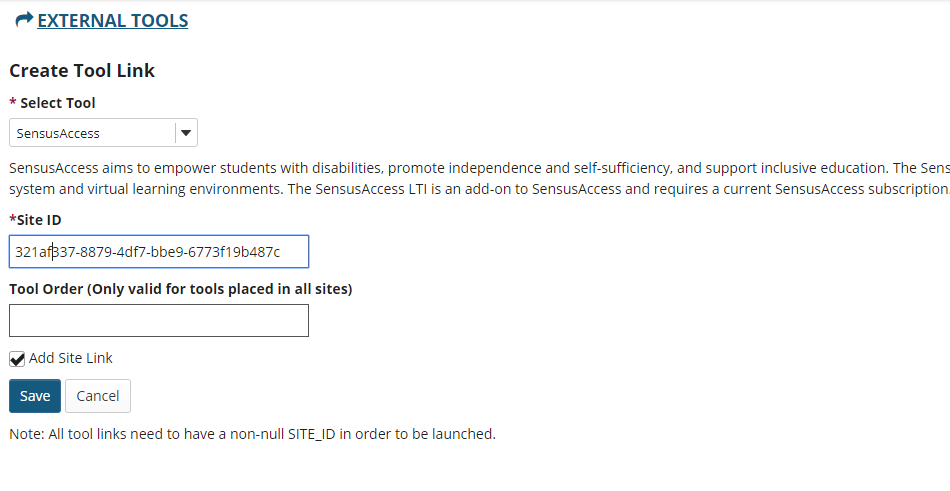
Click on Save button, once Site Id and Add Site Link checkbox checked as shown in the above screenshot.
Now the SensusAccess tool is available to the course whose Site Id is provided. Now go back to Step 4 in the guide.
Now the SensusAccess LTI tool is configured properly and it's time to test the tool. The SensusAccess LTI tool doesn't run with Administrator role, so one has to login with the Sakai system with different user role for instance Instructor, Student, Teaching Assistant etc. Administrator user doesn't support OAuth flow in Sakai.
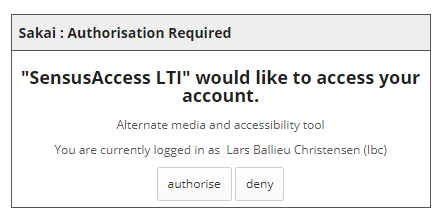
In the course/project, if the user clicked on the SensusAccess tool, SensusAccess conversion tool will be displayed. For the first time, the tool will ask the user's permission to access the course files and once the user gives the permission, the conversion form will be displayed. The user can revoke the permission anytime from the Trusted Applications menu.
Note:
As Safari browser by default does not allow third party cookies in an iframe.
To make the tool runnable in the Safari browser, the user has to uncheck the checkbox Prevent Cross-Site Tracking in Safari browser. See the screenshots below:
Safari browser settings in Mac

Safari browser settings in iPhone/iPad
