Guide to setup SensusAccess LTI 1.3 with Desire2Learn
First we need to register OAuth 2.0, if we have not done it previously. Please go through the following steps to configure OAuth 2.0. If you have already configured OAuth 2.0 in LTI 1.1, skip this step and continue after step 12.
-
Register an account with SensusAccess LTI. Register. Once registered with SensusAccess LTI, one can receive an email confirmation mail with an approval link. Once clicked on the link and successful confirmation message, one can log in into the SensusAccess LTI portal. Remember to check spam email, if you do not see the confirmation email in the inbox.
-
Contact Sensus in order to get your LTI access credentials. In order to process your request please make sure to specify in your email/call/letter the following:
- A mention that you are requesting a SensusAccess LTI account
- Organization name (School/University)
- Full name of contact the person responsible for the SensusAccess LTI account
- The desired email address associated with the SensusAccess LTI account
- Name of the LMS Type (Desire2Learn), you are requesting for
Log into your Desire2Learn account (Administrator).
-
From the Admin Tools menu, click Manage Extensibility.
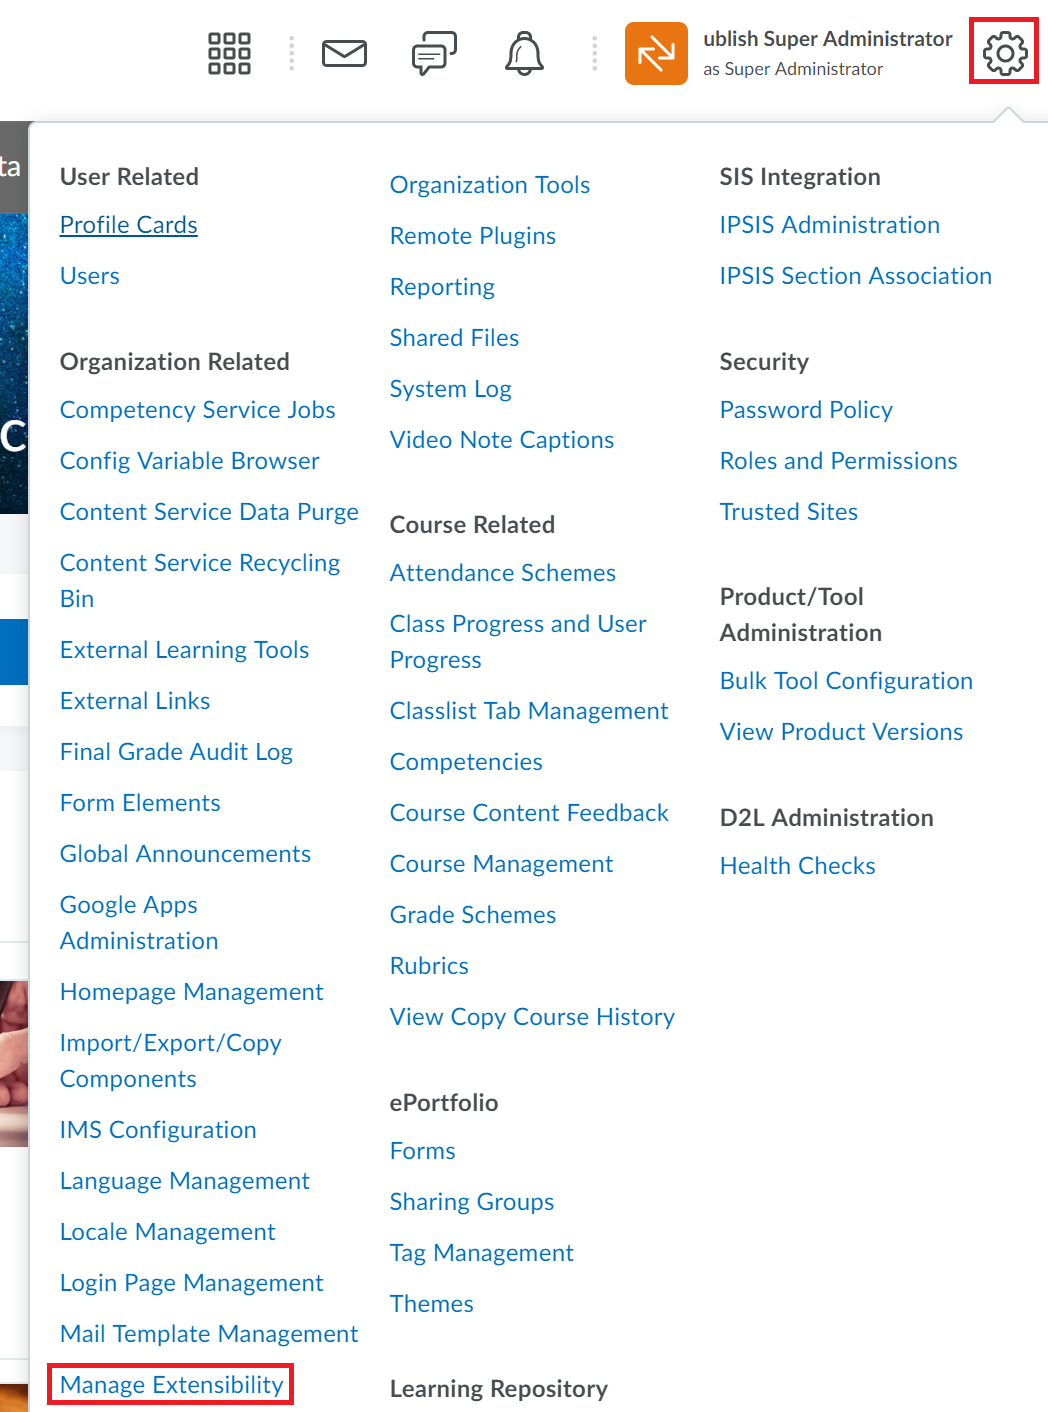
Select the OAuth 2.0 tab and then click Register an app.
-
Fill the details as shown below and click on the Register button.
Application Name: SensusAccess LTI
Redirect URI: https://lti.sensusaccess.com/home/oauth2Response
Scope: content:*:* core:*:*
Access Token Lifetime (seconds): 3600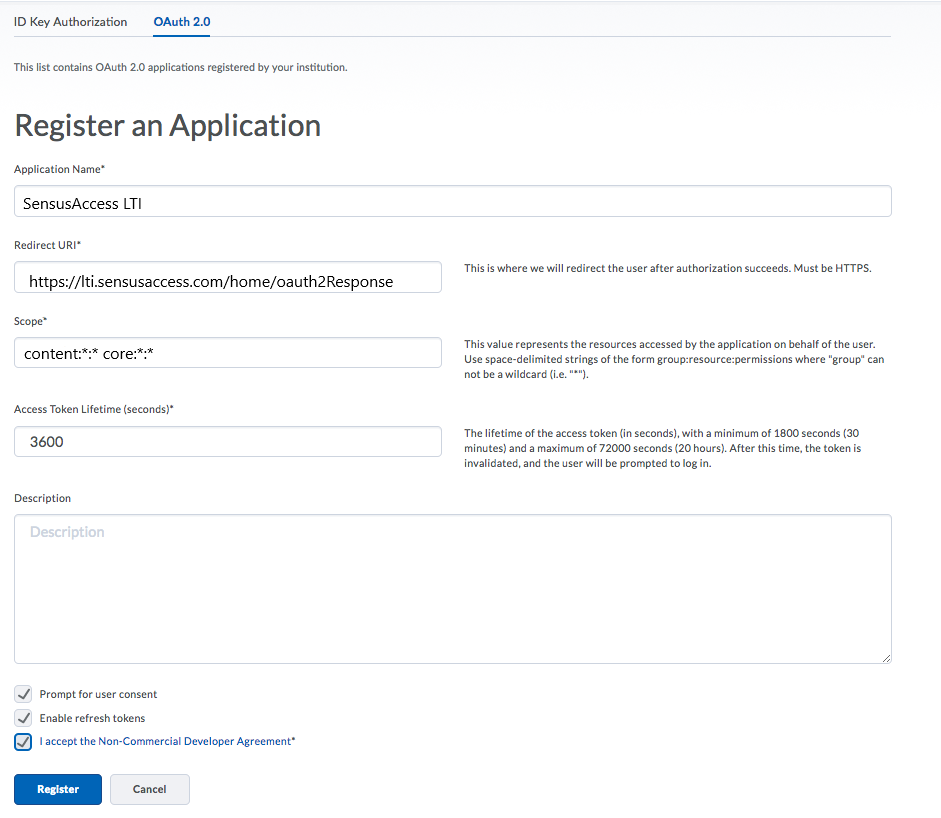
-
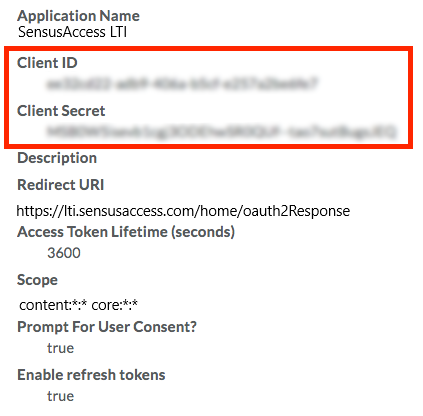
After a successful registration, you should get the following page with a Client ID and Client Secret.
-
You can note down the Client ID and Client Secret because these pieces of information will be needed in the SensusAccess LTI portal later.
-
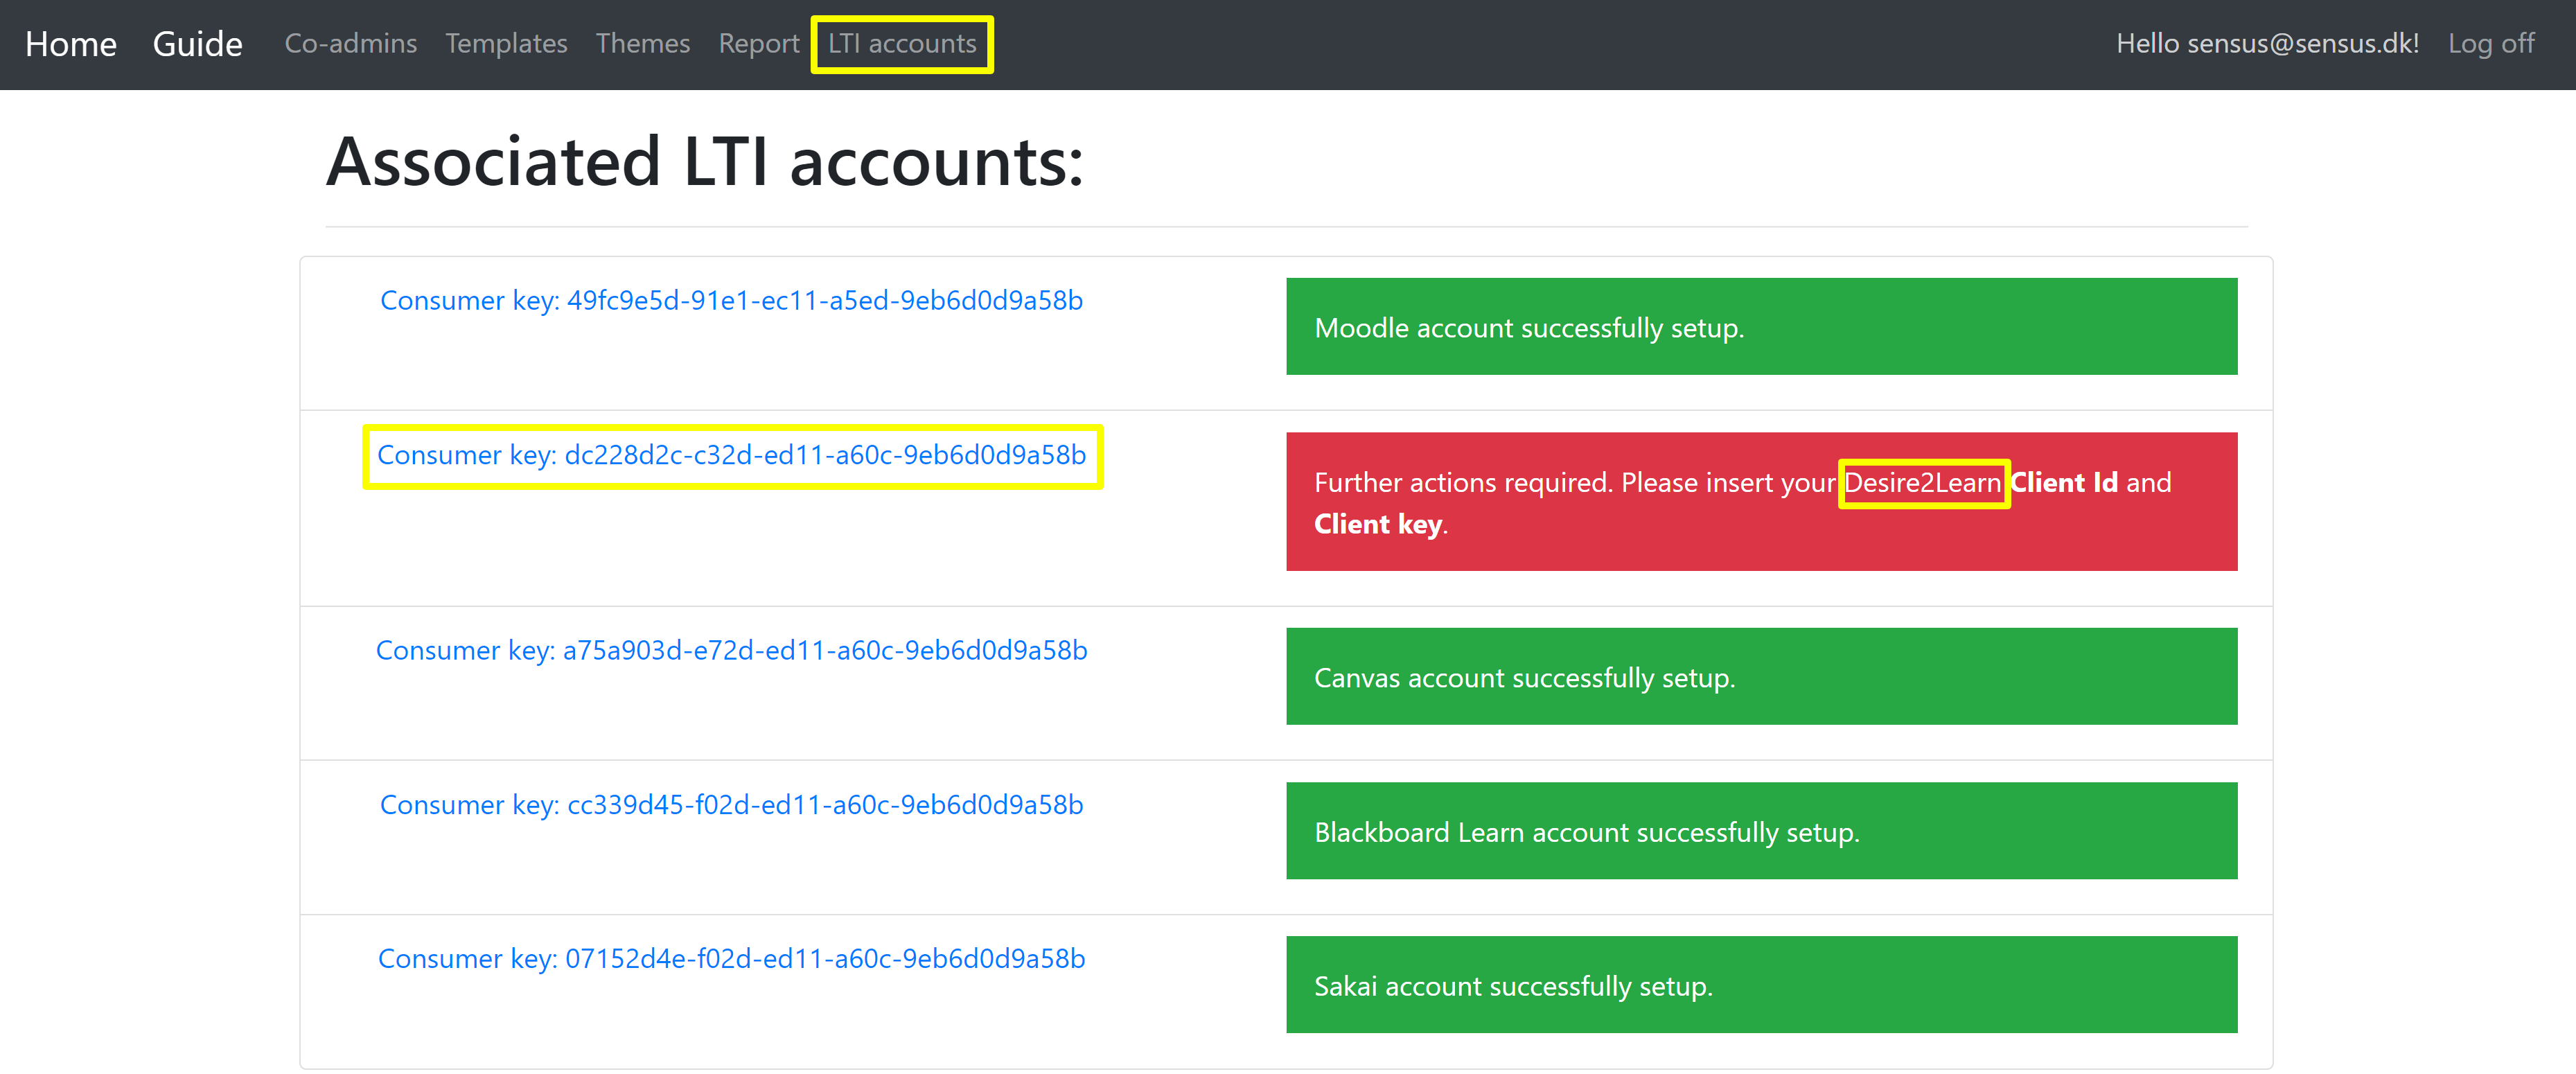
Go to your SensusAccess LTI account and then click on the LTI accounts navbar option. There might be more than one LTI accounts listed in "Associated LTI accounts" section, if the account is associated with multiple LMS.
-
You have to input Client ID and Client Secret that you received in step 7.
-
Insert the Client ID and Secret key and then click Save.

-
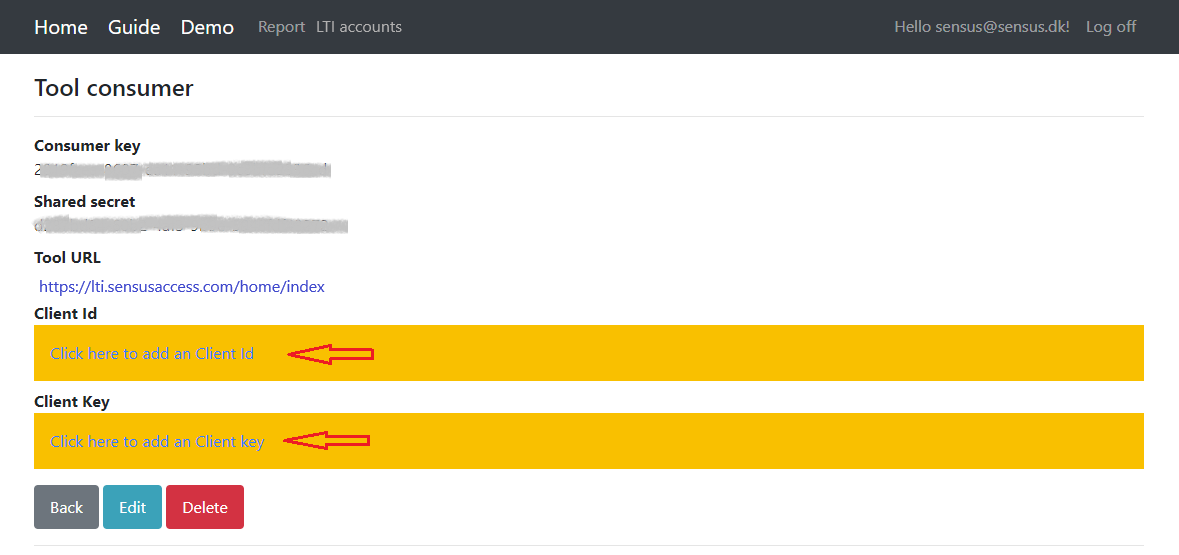
Remaining in the LTI account page, you will see the Consumer Key, Shared Secret and Tool URL.

Create LTI Advantage Tool
- Log in to your Desire2Learn account (Administrator) and from the Admin Tools menu, click Manage Extensibility.
- Then click on LTI Advantage and then Register Tool
-
Now you need to fill the form as per the following details.
- Name: Give a relevant name.
- Description: Give a relevant description.
- Domain: https://lti.sensusaccess.com
- Redirect URLs: https://lti.sensusaccess.com/LTI13/LTIResponse
- OpenID Connect Login URL: https://lti.sensusaccess.com/LTI13/OIDCLogin
- Keyset URL: https://lti.sensusaccess.com/LTI13/JWKS
- Extensions: At this moment we do not need to select any extension.
- Roles: Check in Send Instituation Role.
- Then you can click on Save and Close.
- Now, we need to save some credentials from D2L to the SensusAccess portal.
-
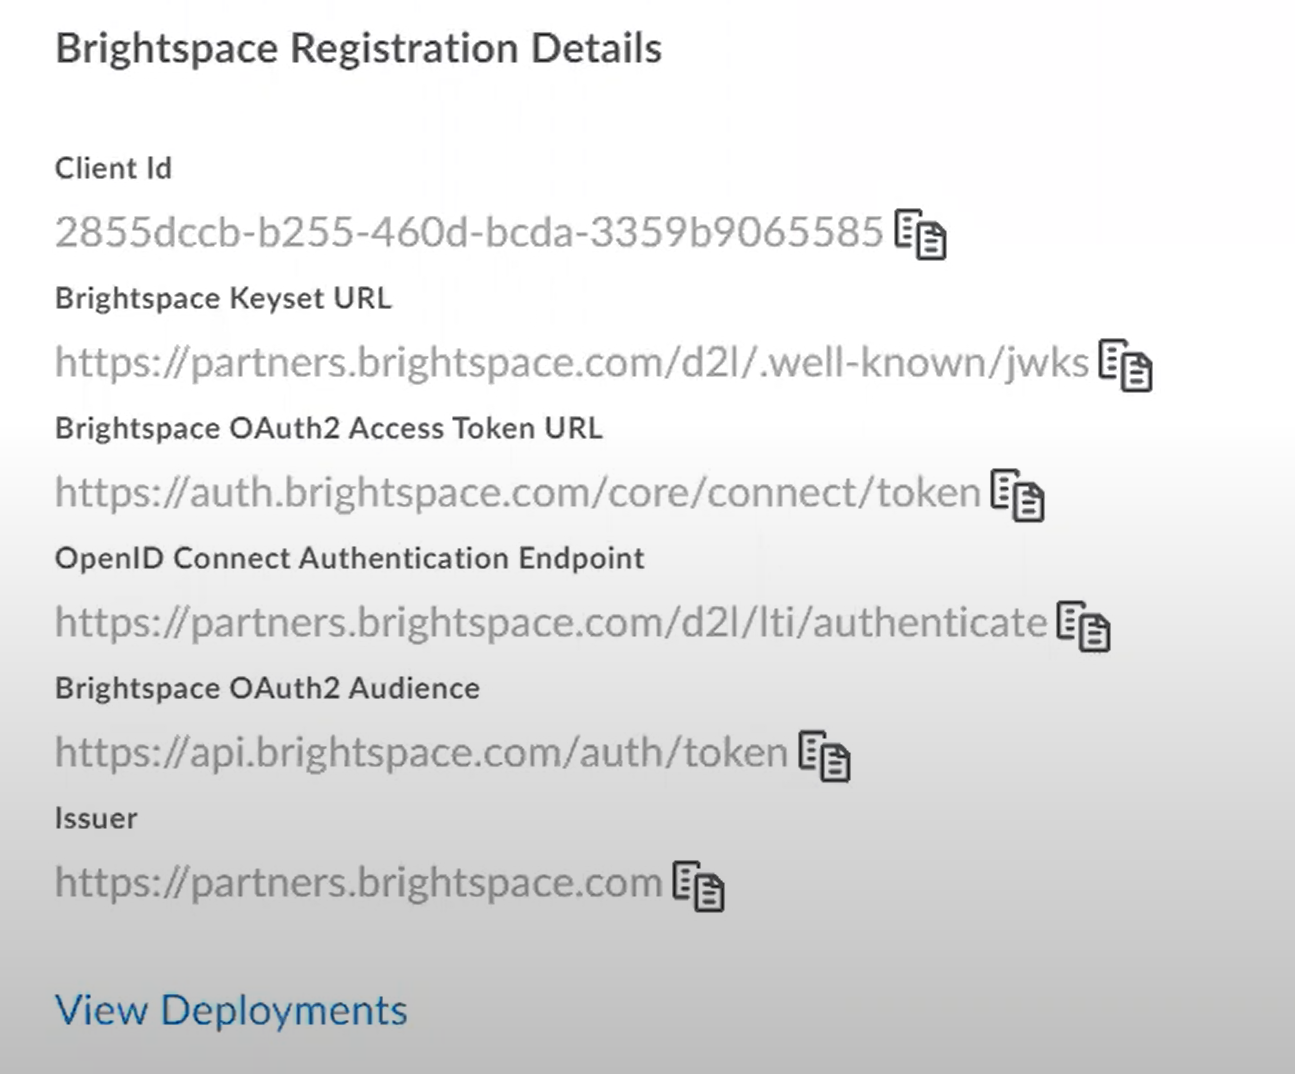
Just go to the bottom of the LTI Advantage tool you created and you will see the credentials as below.
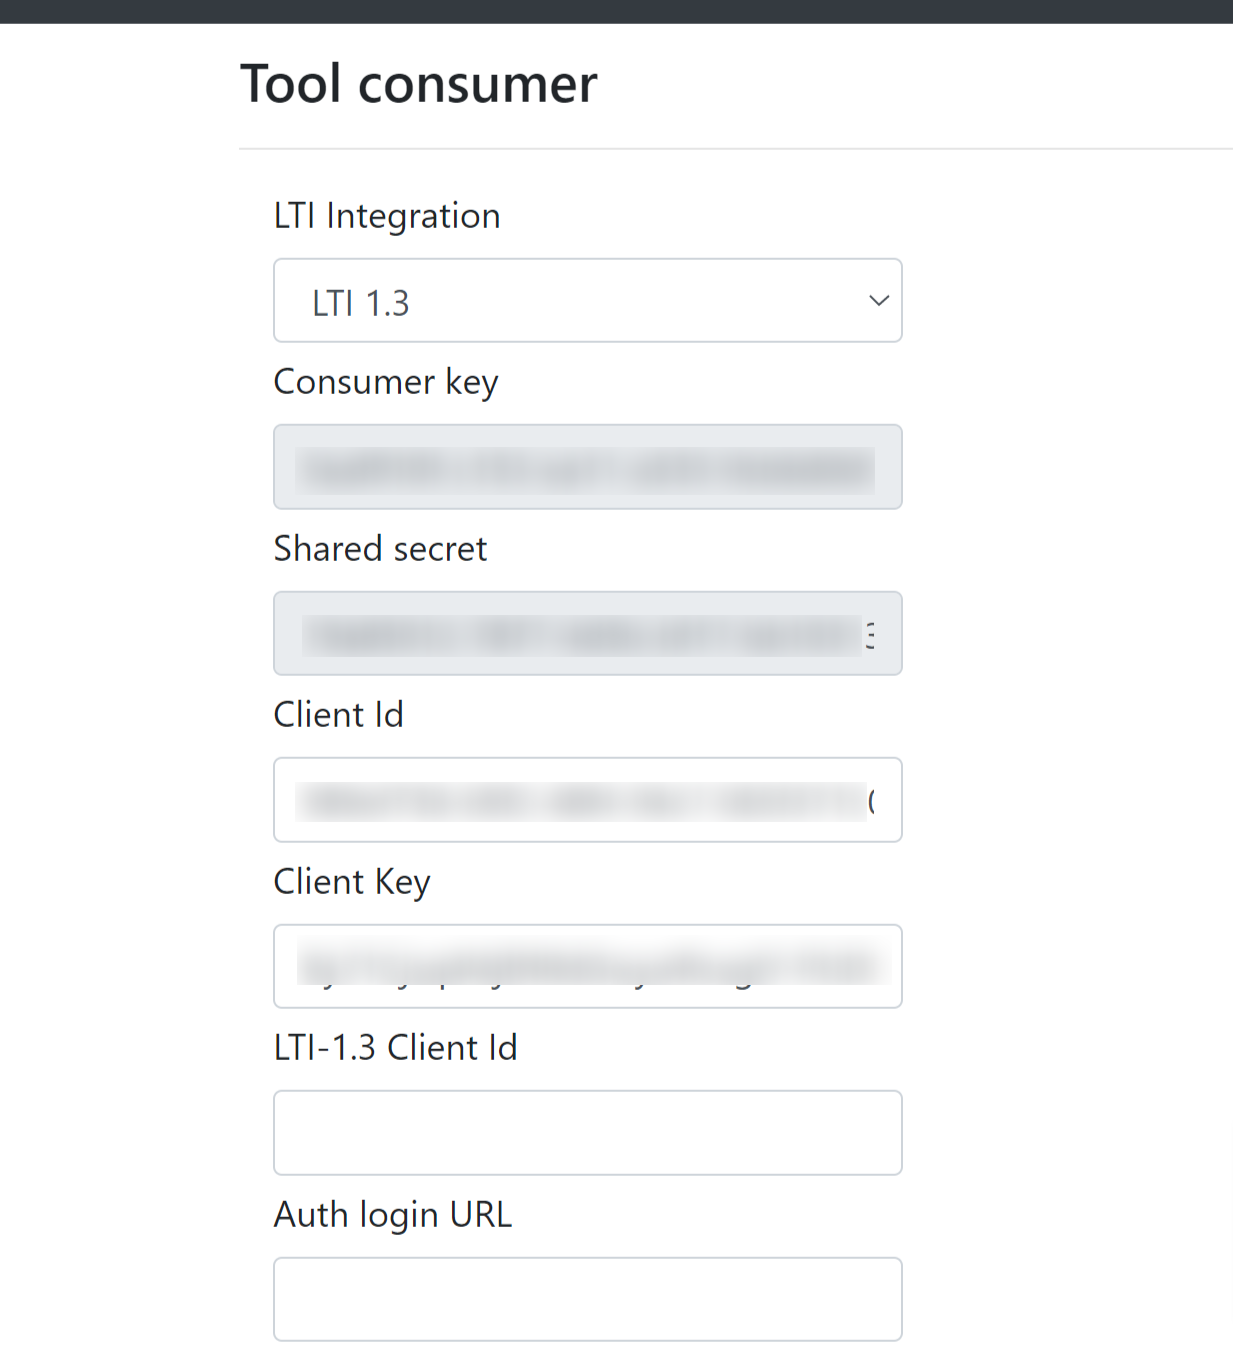
- Login to your SensusAccess LTI account and edit Desire2Learn account. Now choose LTI 1.3 from the LTI Integration.
-
Copy your D2L Client ID to LTI-1.3 Client Id and
OpenID Connect Authentication Endpoint to Auth login URL in the SensusAccess.
Create Deployment Tool
-
Deployment tool is used to deploy your LTI Advantage tool. To create the deployment tool go to the bottom of the
LTI Advantage tool you created and click on View Deployments and then in the new page click on
New Deployment button and fill the form as follows.
- Tool: Select the LTI Advantage tool you created.
- Name: Give a relevant name.
- Description: Give a relevant description.
-
Security Settings: In the security settings enable the following options:
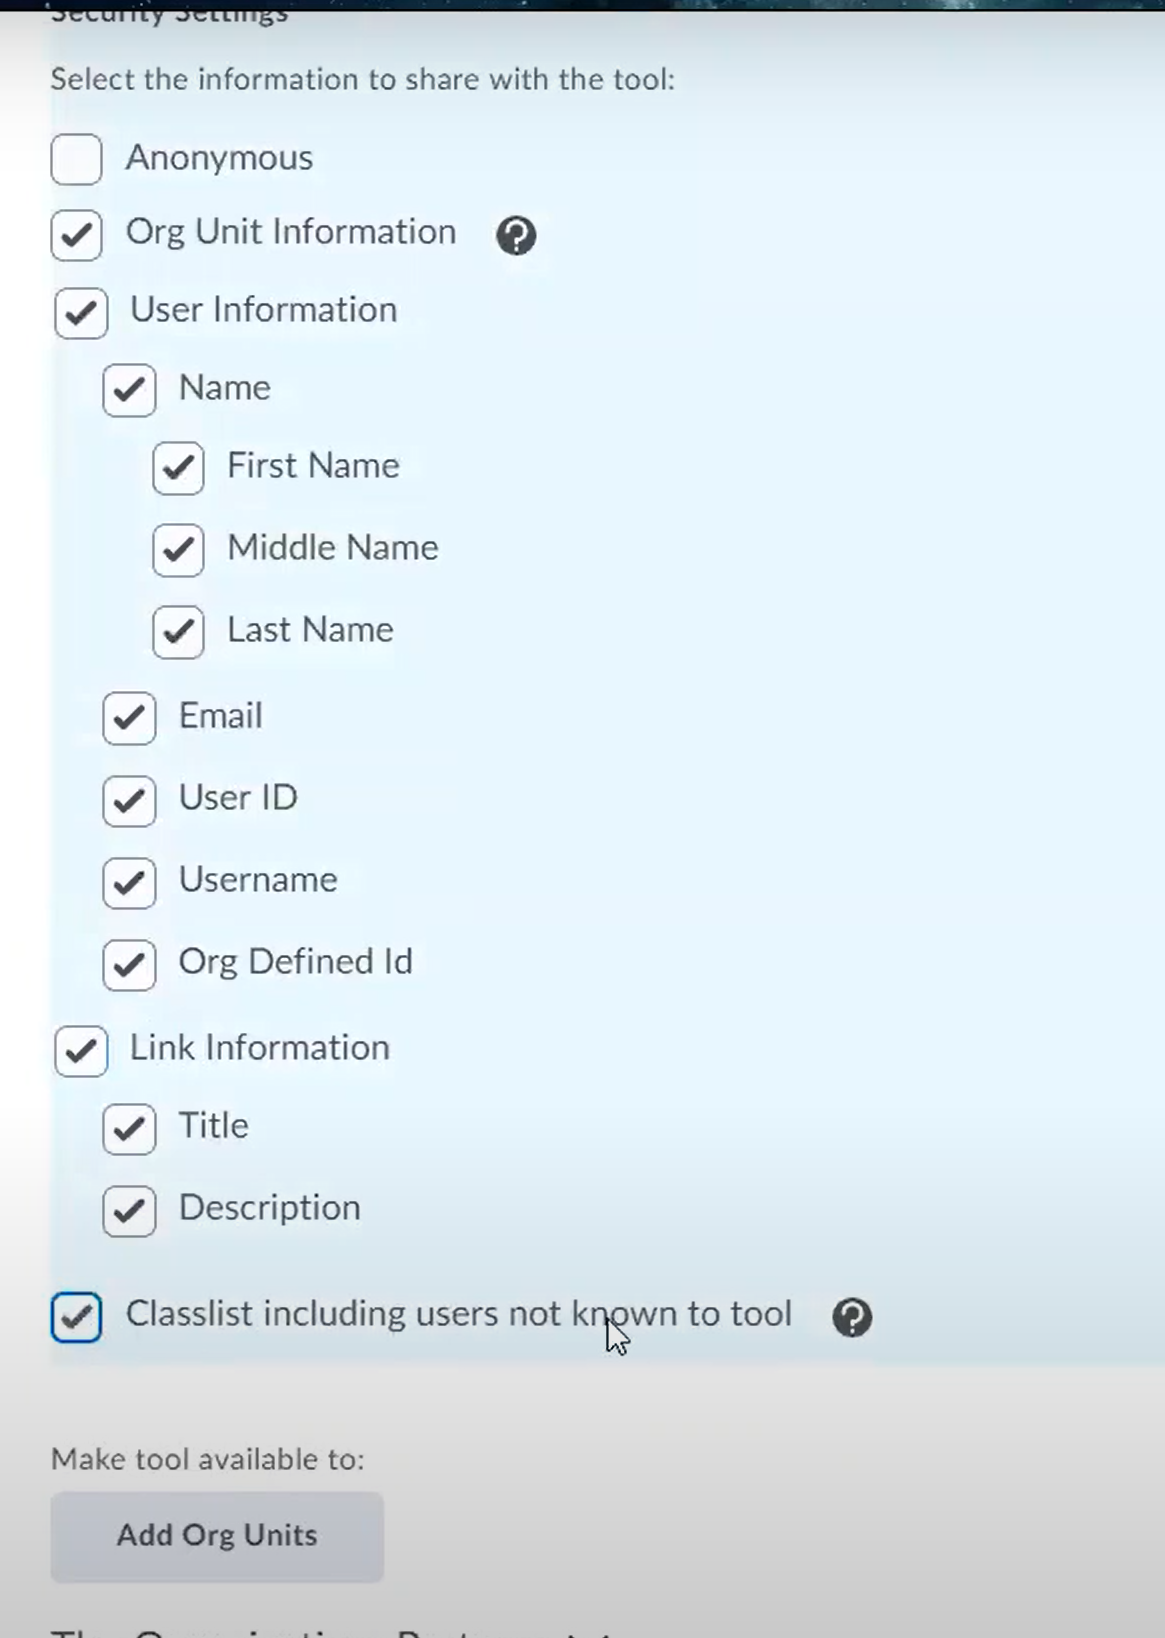
- Now, click on Add Org Units to add the tool in your courses. Select your desired courses and click on Add.
- So, everything is done and now we just need to click on Create Deployment to deploy the tool to the courses.
Create Link
Now, we need to create a link from the Deployment tool we created. Go through the following steps to create link.
-
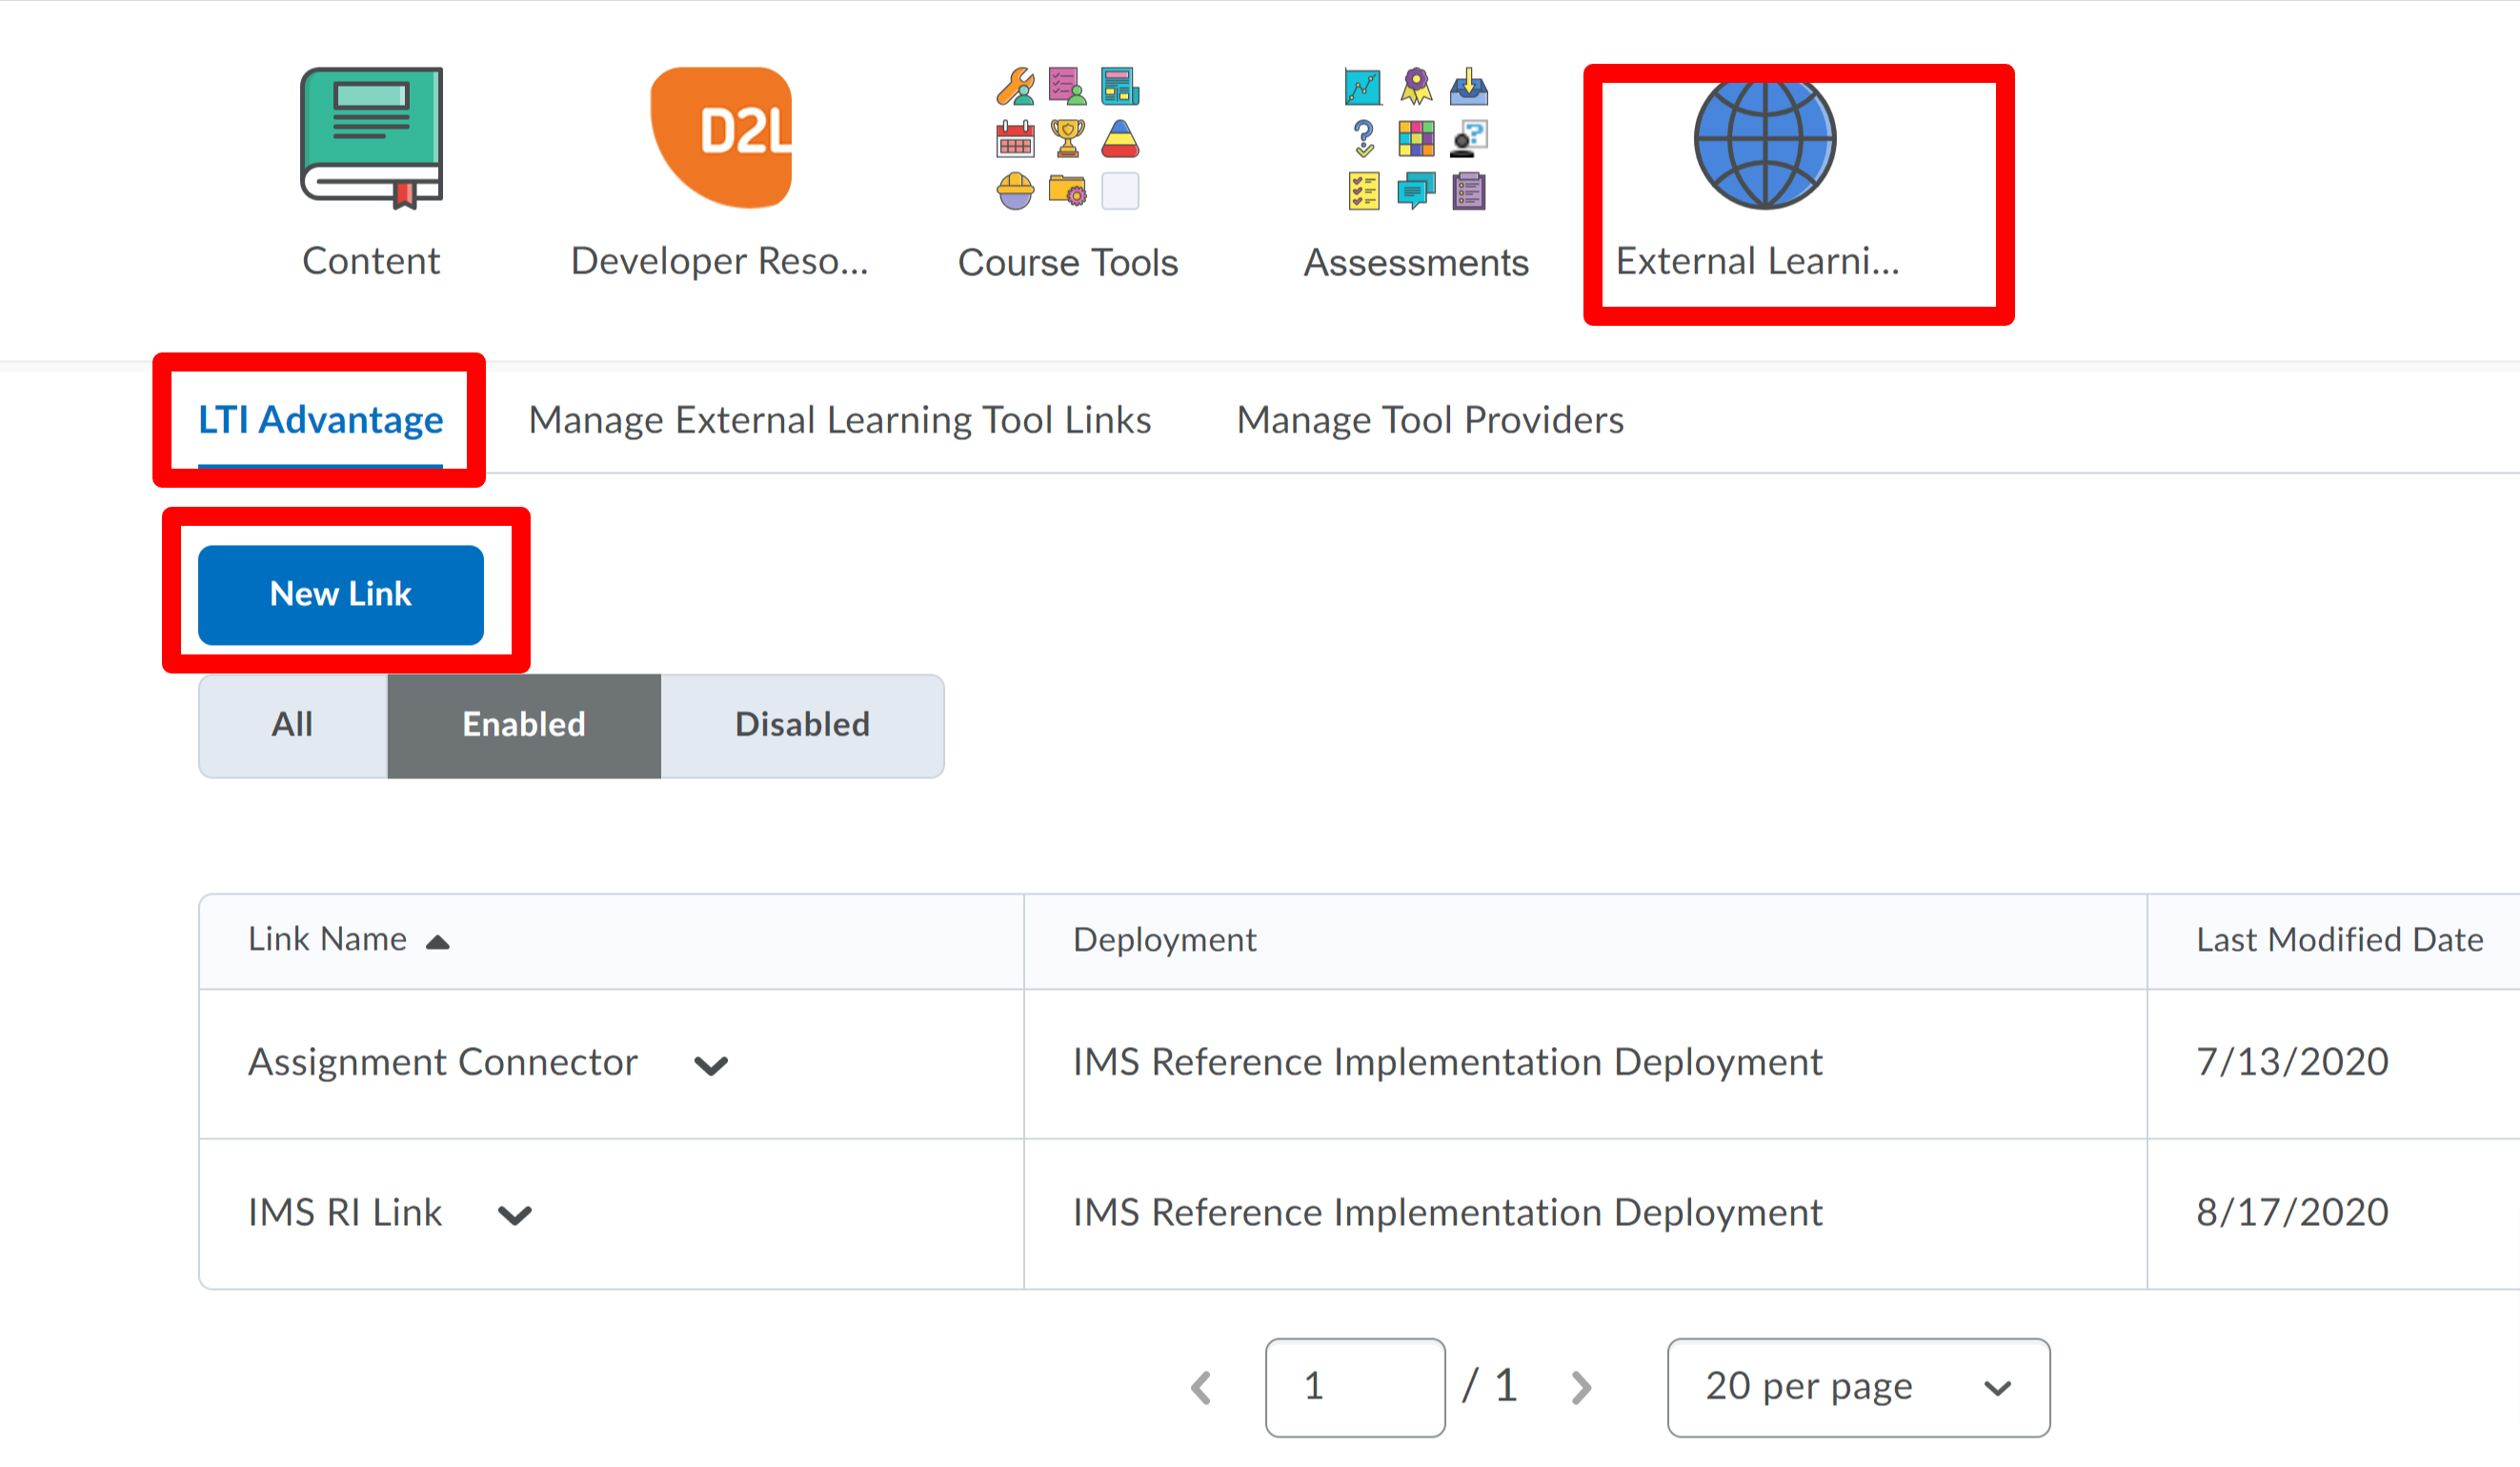
Go to External Learning Tools and click on LTI Advantage and
then press on New Link to create the link.
-
In the Create Link page, fill the form as follows:
- Deployment : Select the Deployment you just created.
- Name: Give a relevant name.
- URL: https://lti.sensusaccess.com/LTI13/OIDCLogin
- Description: Give a relevant description.
-
Custom Parameter:
Custom parameter is used to support localization. The tool's default language (if not supplied any value)
is en-GB (British English). But one can provide other supported options like language=en-US or language=en-AU or language=da-DK or language=it-IT or language=fr-FR or language=es-ES.
Name: language
Value: en-US
Add the tool to courses
There are two ways to add an LTI link to the course. Please choose one option based on your needs:
- Add the tool to the navbar in all courses.
- Add the tool to a specific individual course.
Add the tool to the navbar in all courses
To add the external tool in the navbar for all courses, follow these steps:
-
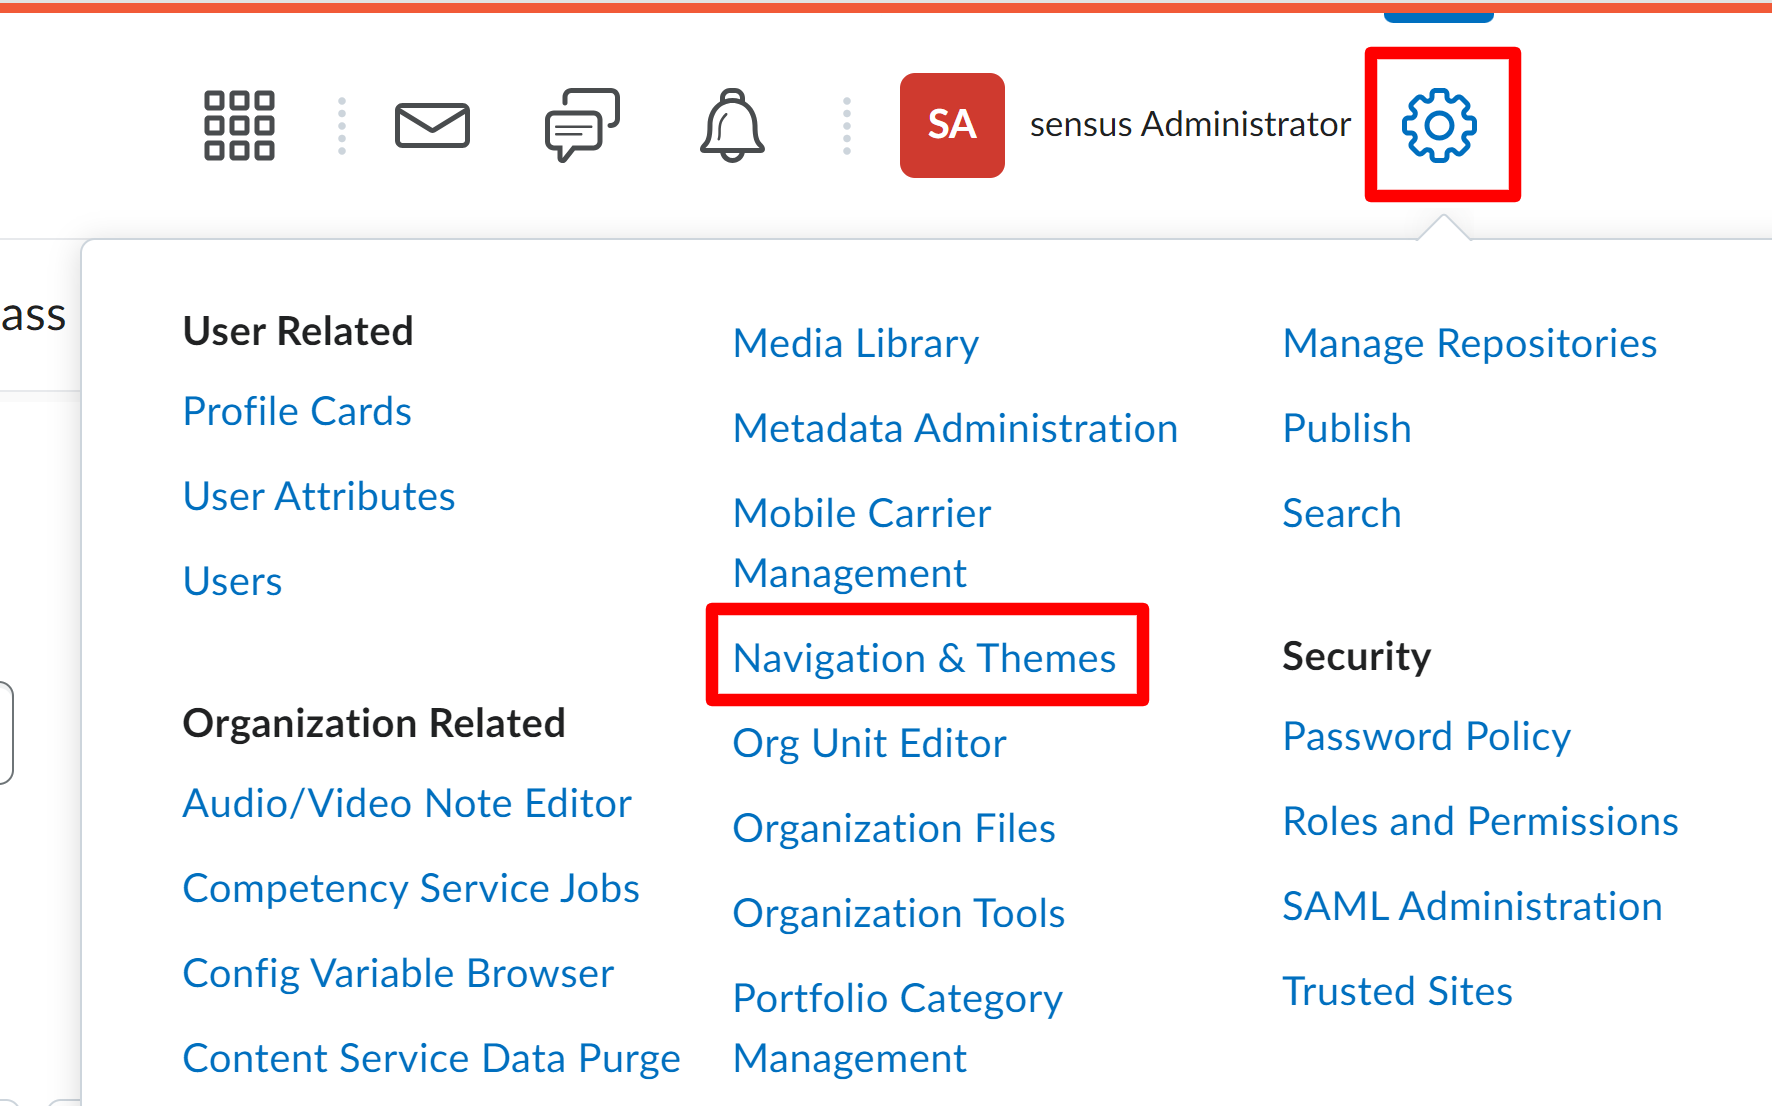
From the Admin Tools menu, click Navigation & Themes.
-
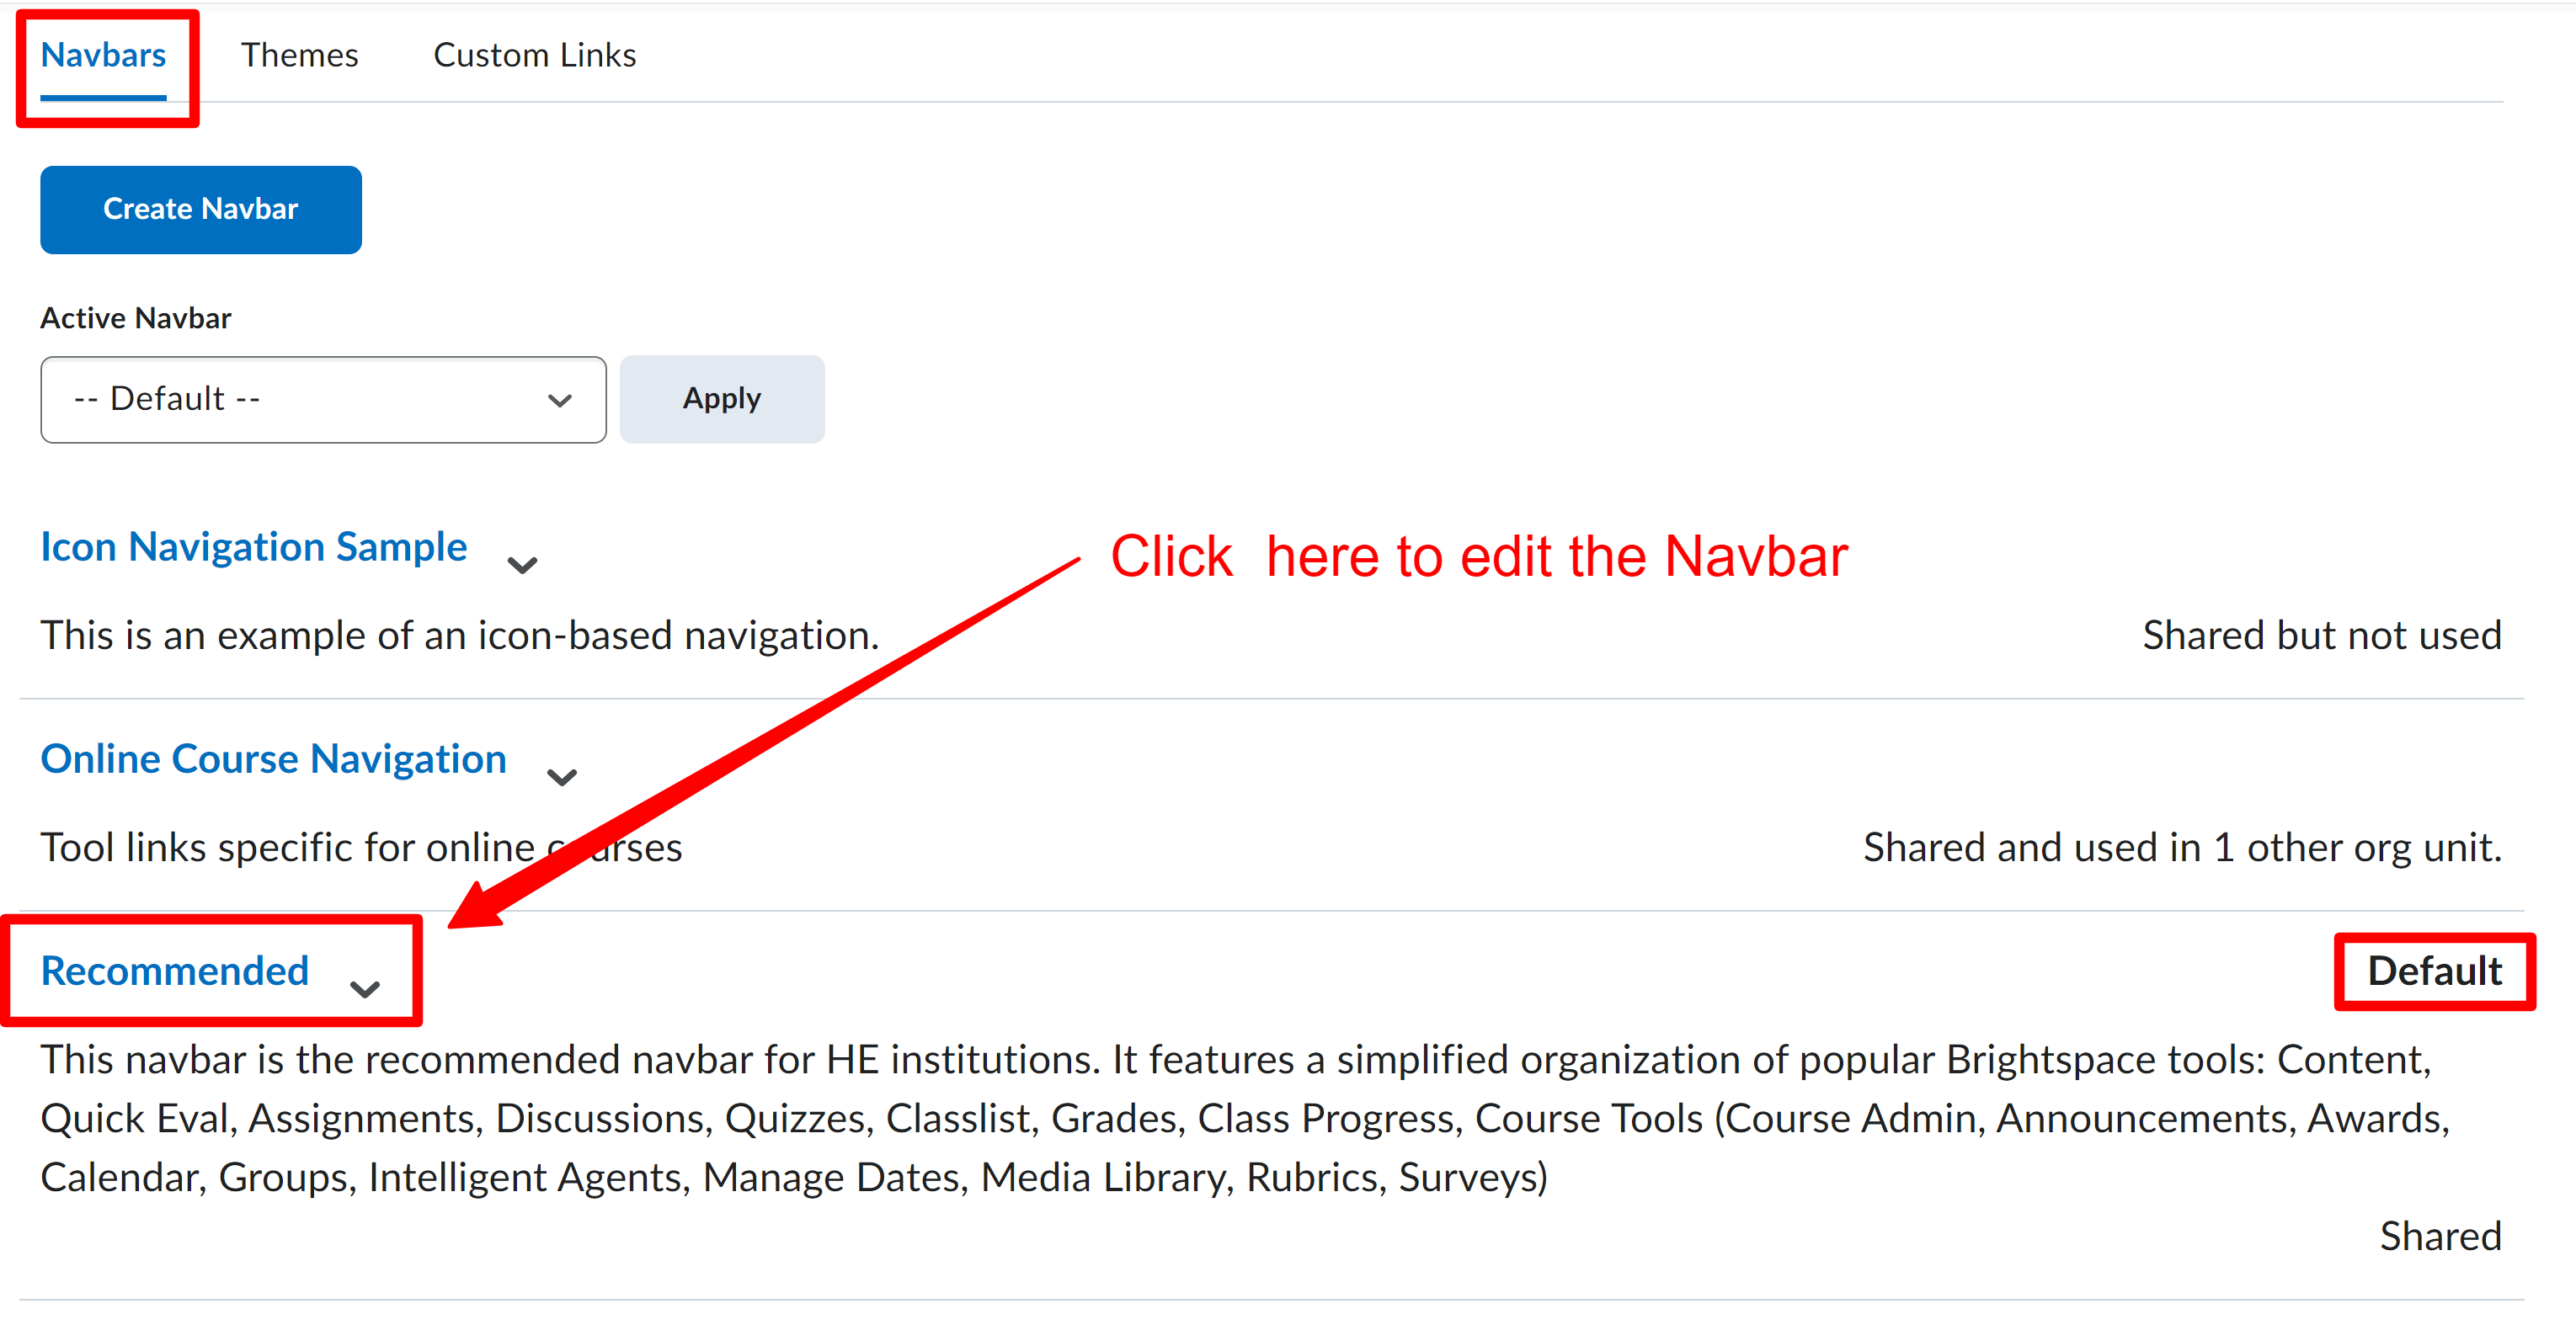
Click on the course navbar you want to modify. The active one is the one that says Default.
-
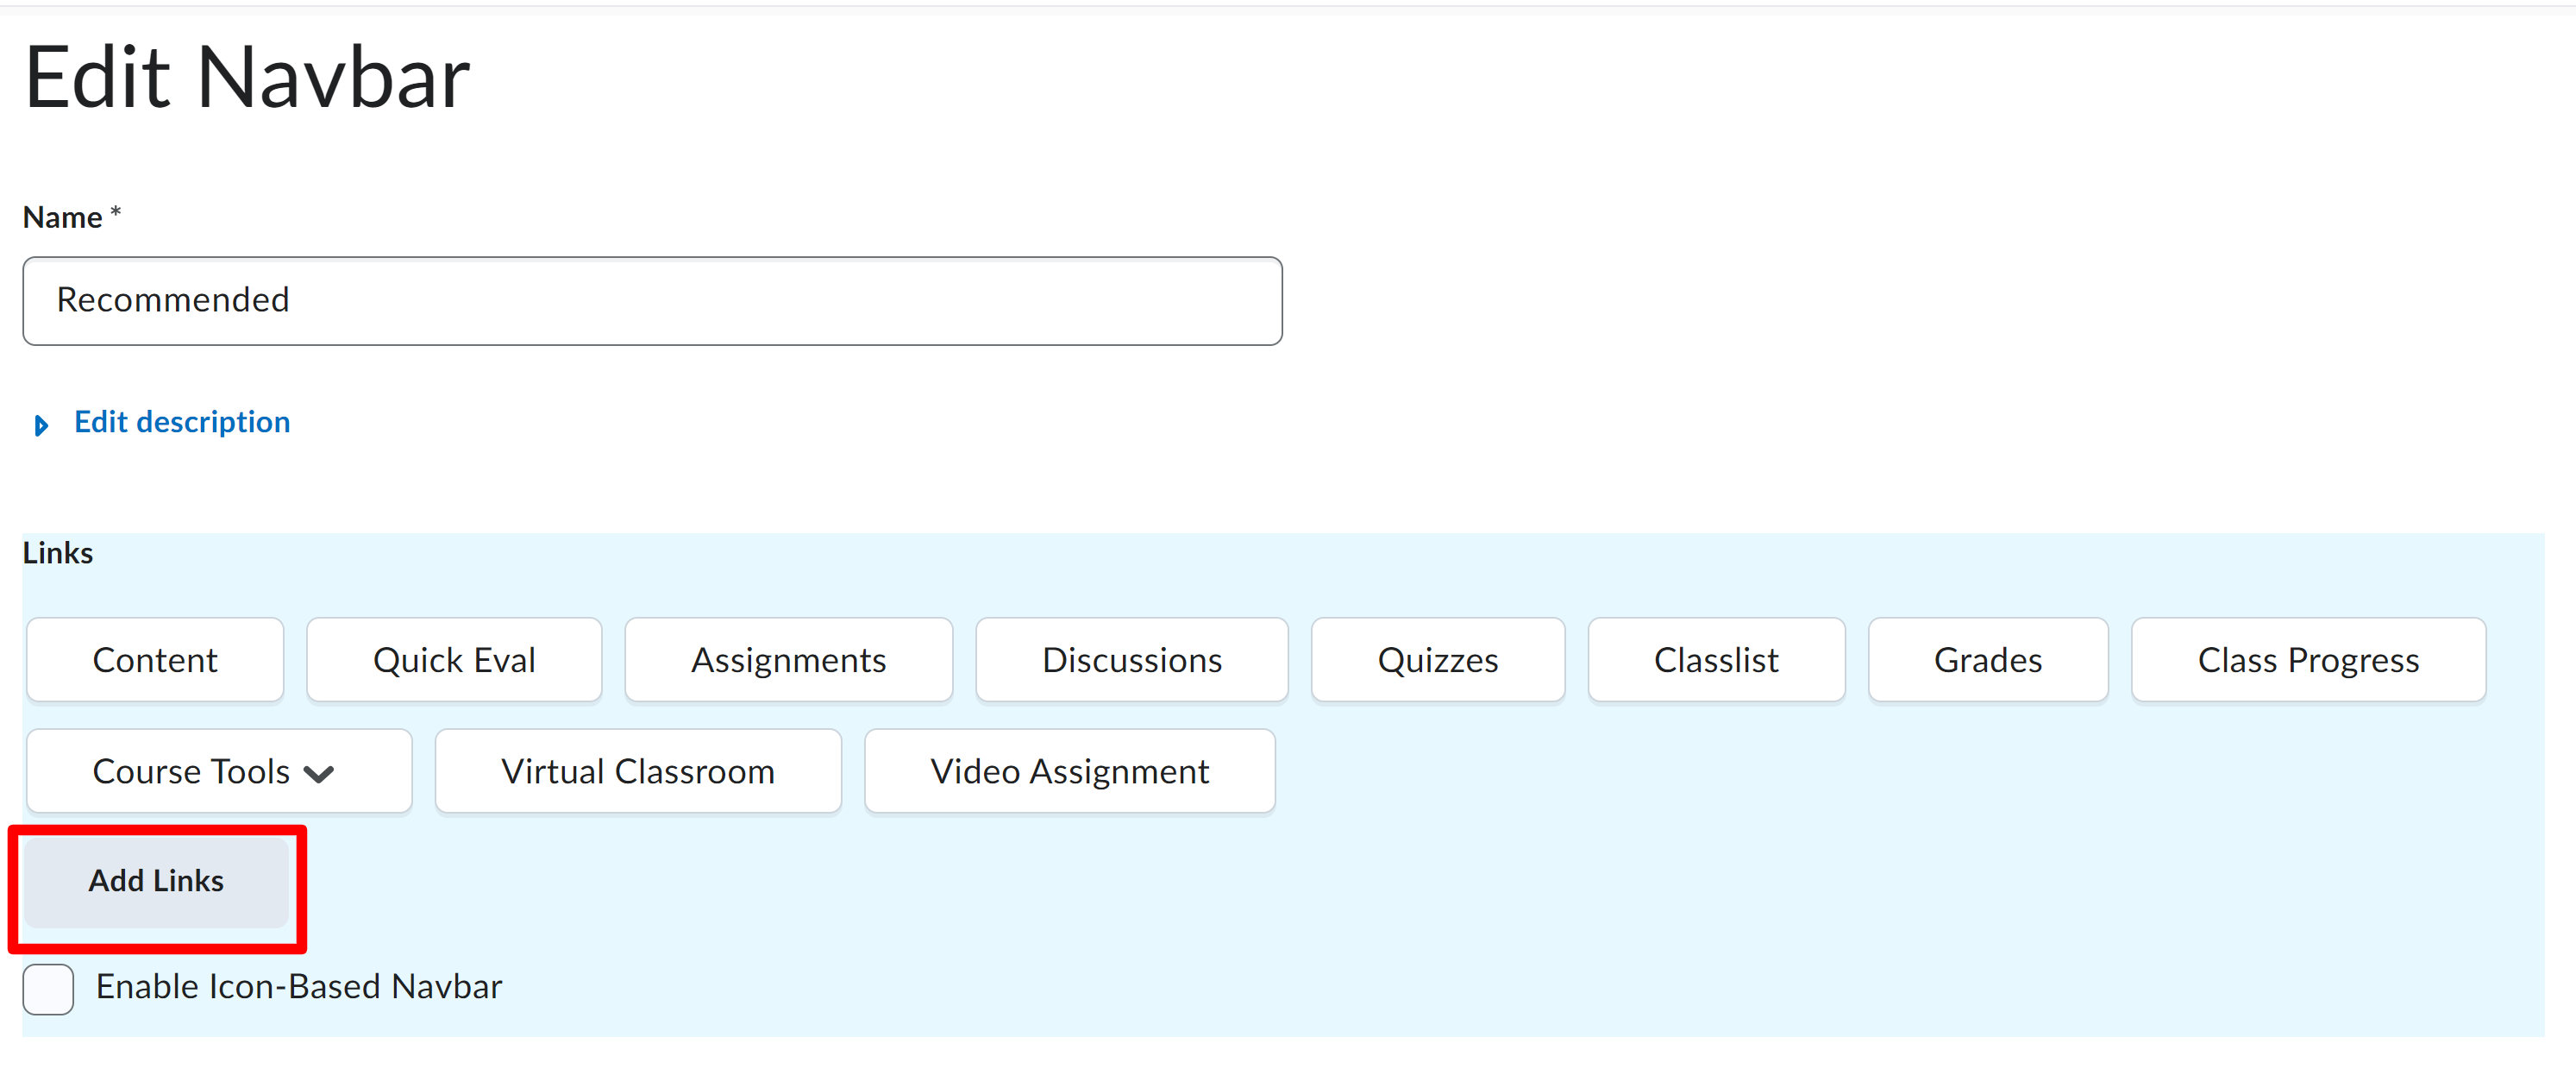
Click Add Links.
-
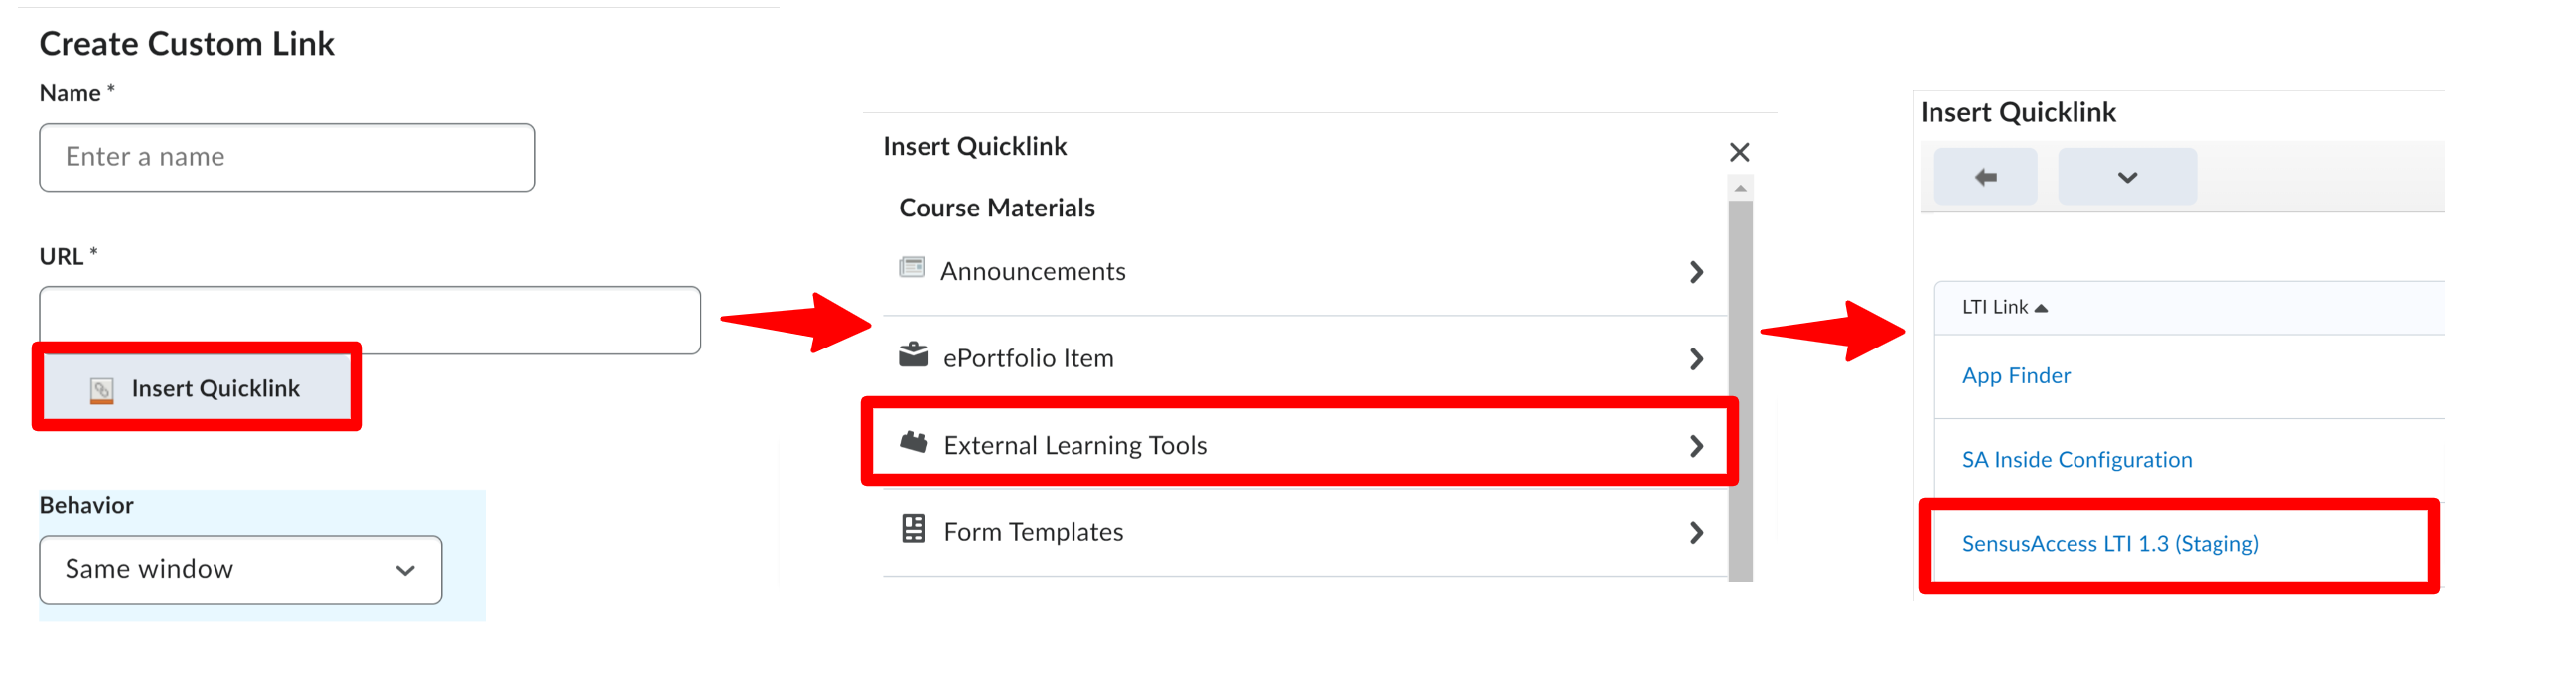
Click Create Custom Link.
-
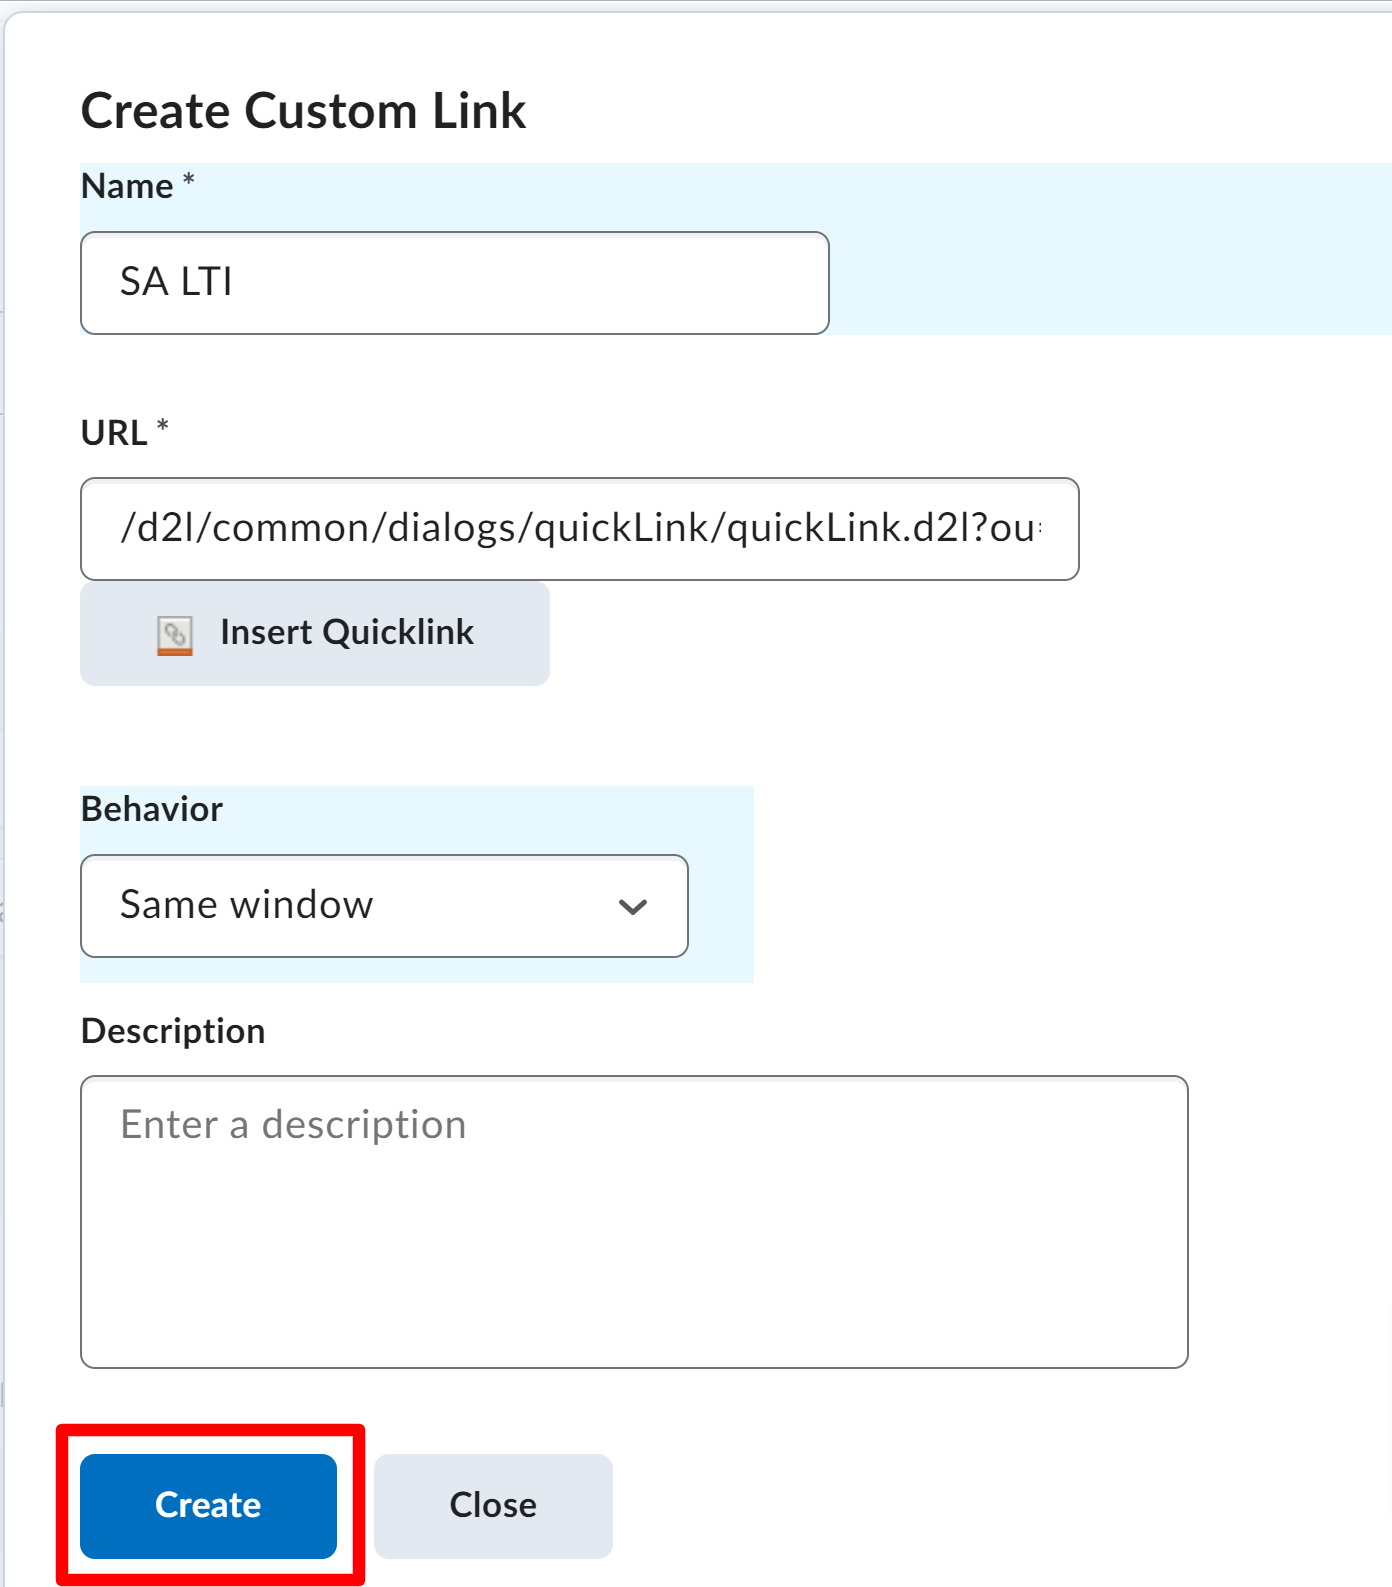
Ensure the following fields are filled in:
Name: The name of the link as it appears in the navbar.
-
URL: Click Insert Quicklink > External Learning Tools and then select the LTI tool you want to create a navbar link for.
-
Behavior:Determines the behavior of the user interface when the link is clicked. Seleted Same window if you want to open the tool on the same window with Navbar.
If you selected New window/tab, specify the Width (px) and Height (px) of the new window/tab.
Under Browser Attributes, specify if you want the new window to include the Menubar (File, Edit, etc.), or the Toolbar (Back, Refresh, etc.) or neither of these options.
Dscription:Provides an optional description of the custom link.
Icon:An icon to use with the custom link.
-
Availability:An icon to use with the custom link.
To share with child organization units, select the Share with child org units checkbox.
To limit the visibility of the custom link to specific roles, select the Limit to specific roles check-box and then select the roles.
To limit thevisibility of the custom links to users with specific locales, select the Limit to specific locales checkbox and then select the locales
-
Click Create.
-
Click Add, having the recently created tool selected by default.

-
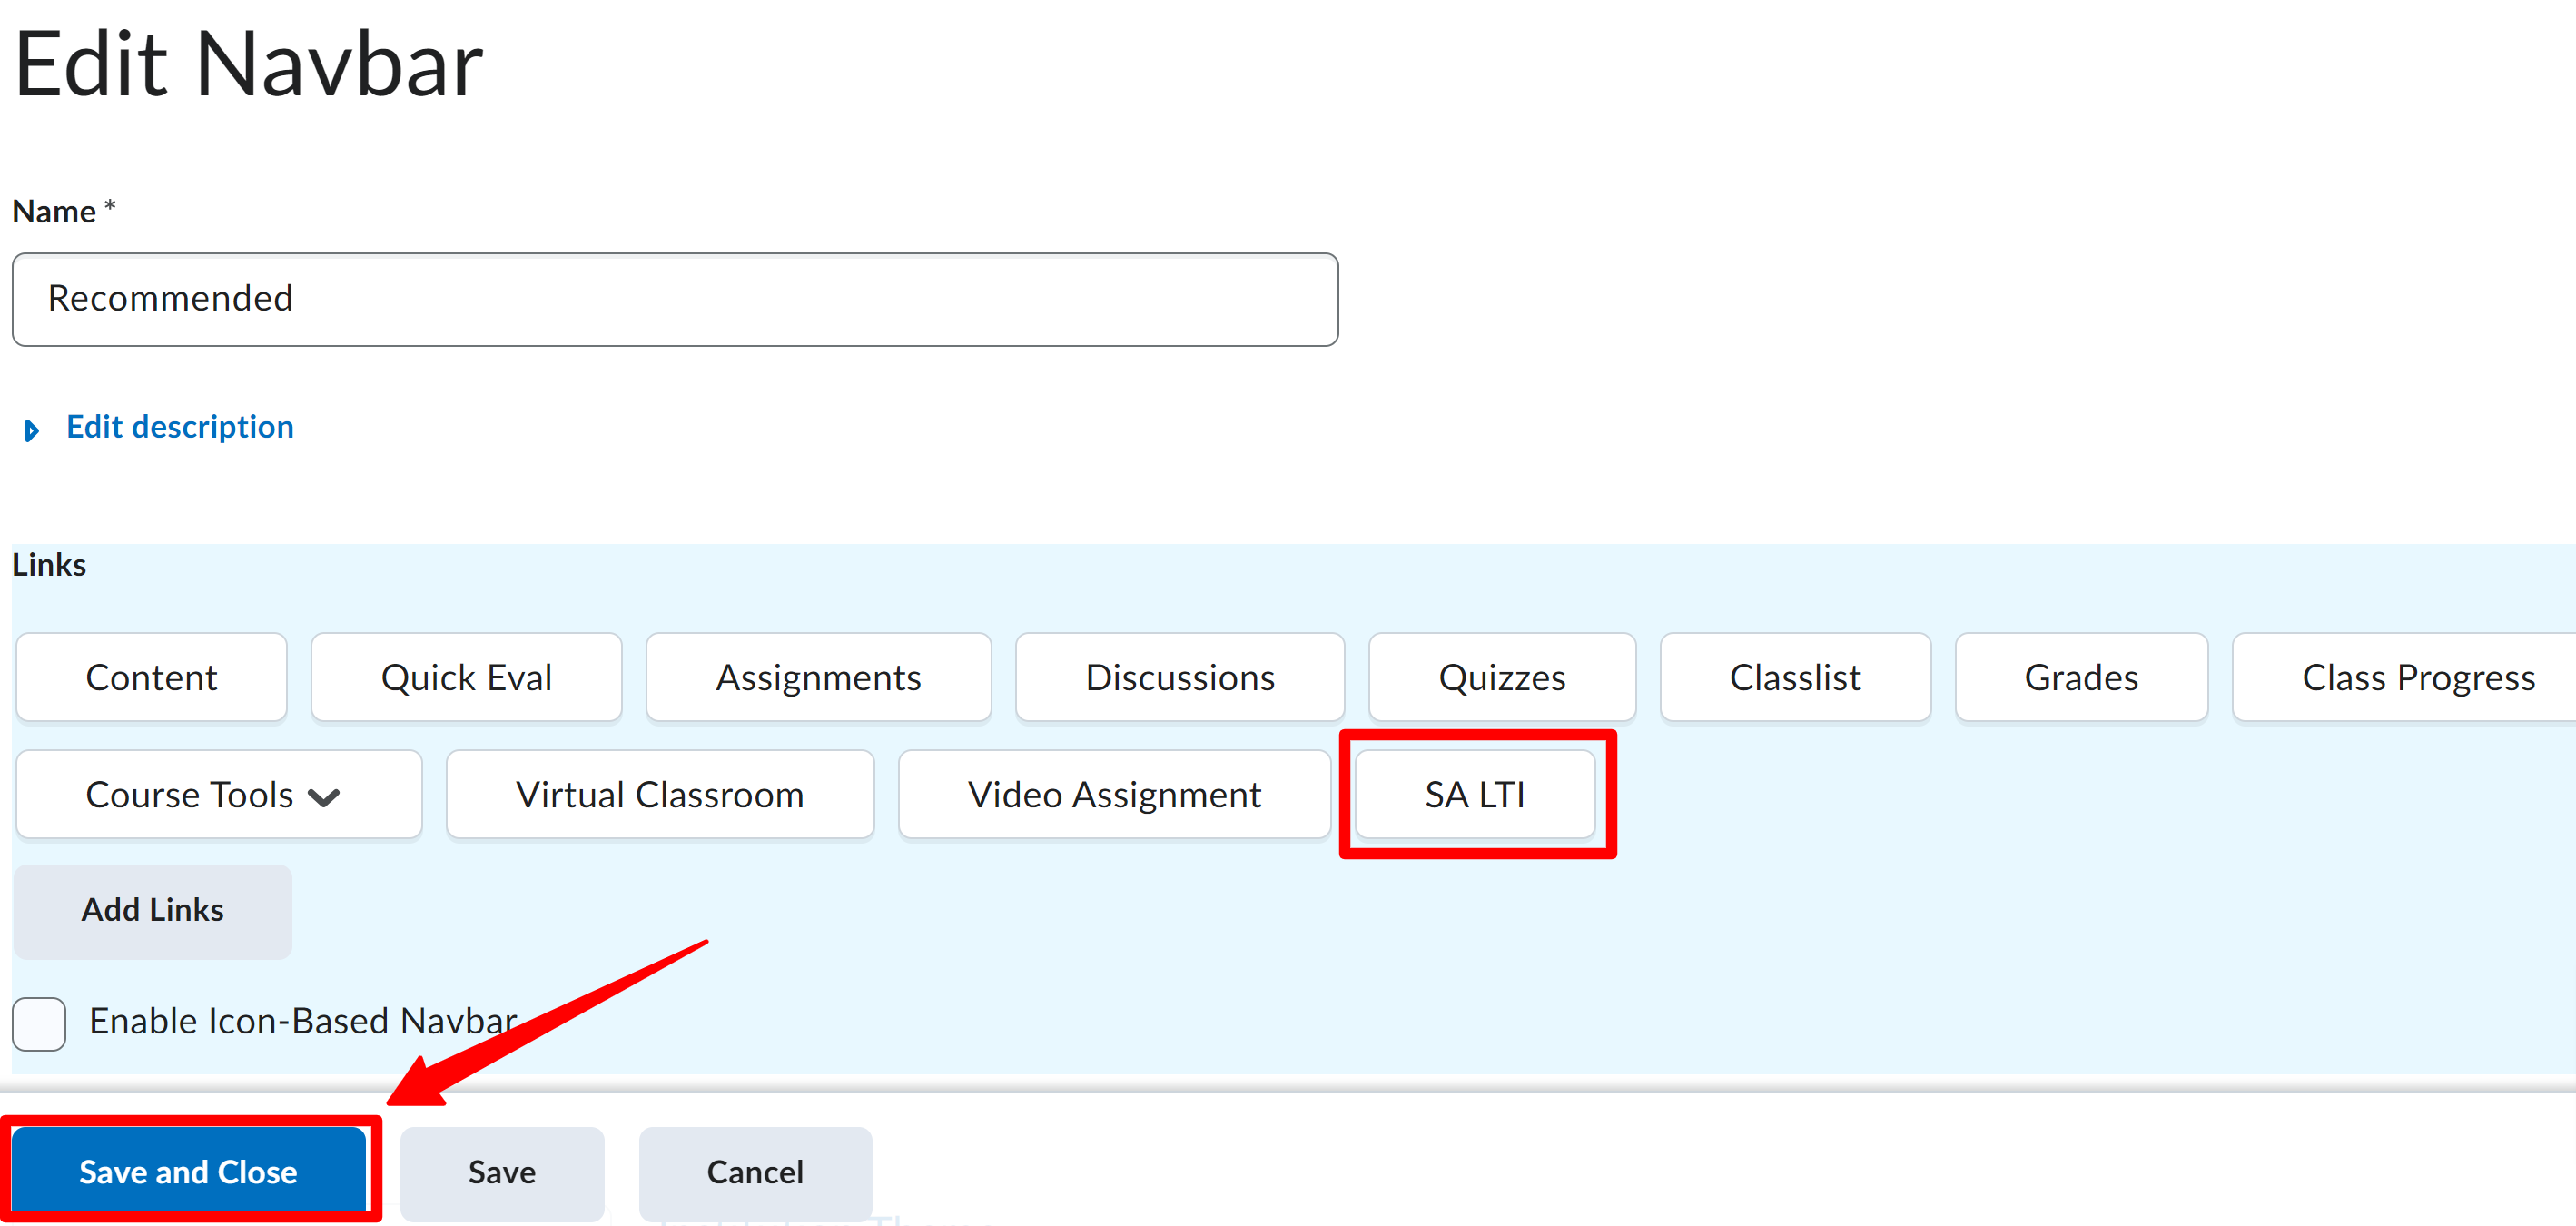
You will find the recently created link under the Links section.
-
Click Save and Close.
-
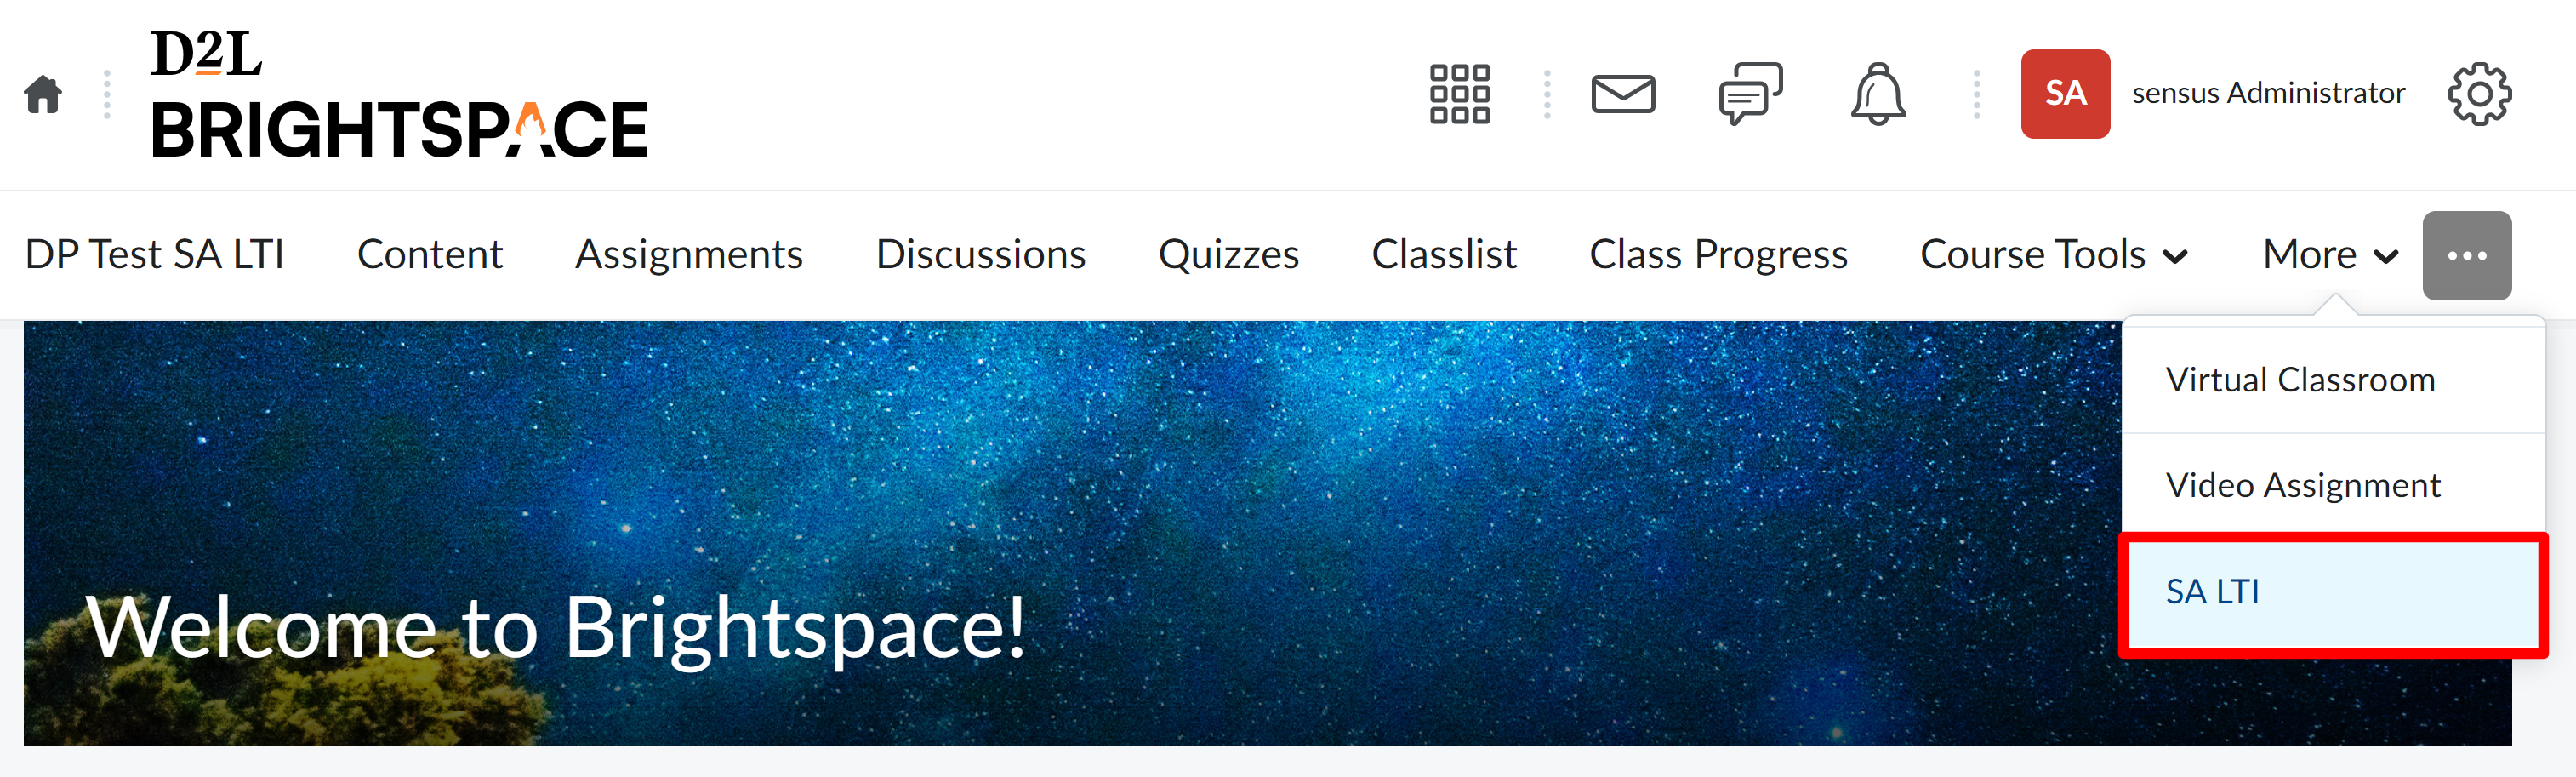
You can find the tool link in the Navbar for all the courses. It should appear in the More dropdown of the Navbar or directly on the Navbar itself, depending on the positioning.
To add only to specific individual course
To add the external tool for a specific individual course, follow these steps:
-
In order to add the configured tool, you have to go to the course where you need to add the tool and click on Add Existing Activities and click External Learning Tools.
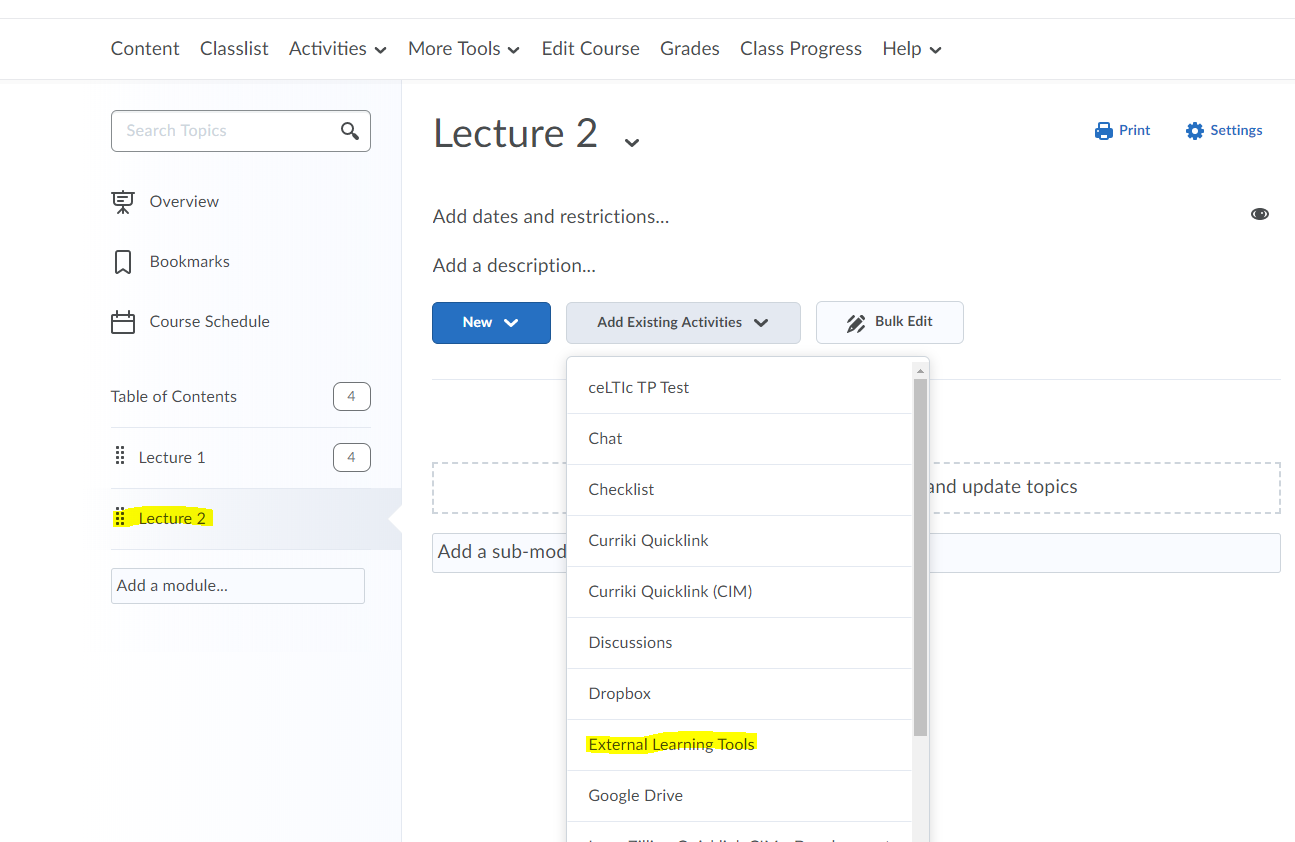
After this you need to select the added tool from the list of the LTI links and click on it to add it.
-
Once done you will be able to add the LTI Tool to any course and the SensusAccess form will appear.
The form will load automatically when clicking on the embedded link inside any course. It should also be able to list all files within the course and the conversion results will be available either for direct download or sent to the email address of the logged in user.
If instead of the SensusAccess form you are presented with the SensusAccess LTI home page. Please check again that all the necessary configurations have been done correctly and that you have added the correct Consumer key/shared secret etc. inside your SensusAccess LTI account.
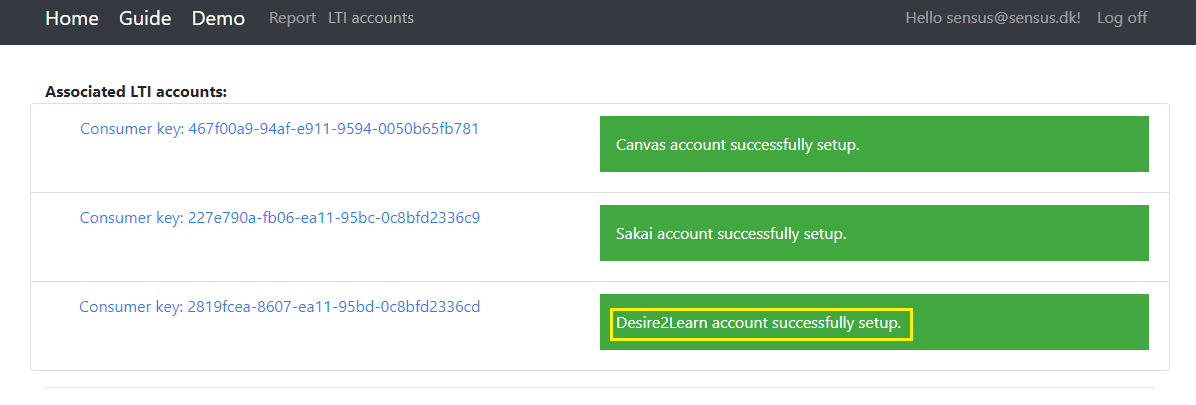
Note: Now, after logging into the SensusAccess LTI portal the Associated LTI account you have just finished setting up will appear in green.
Follow the steps below only if you want to remove the authorization of each application registered using OAuth 2.0
-
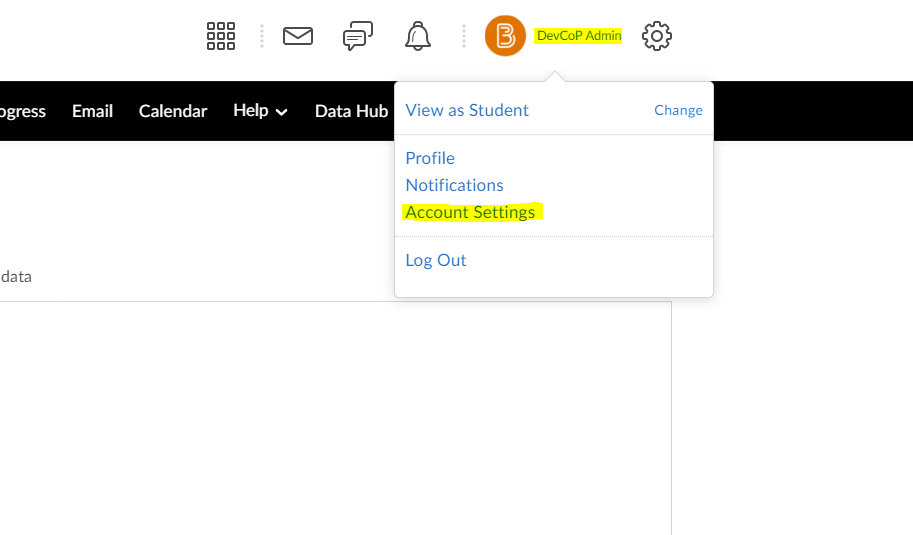
It is possible to revoke authorization of an anthorized application and once revoked, the application will ask again for authorization. Go to the Account Settings.
-
Scroll to the bottom of the page.
-
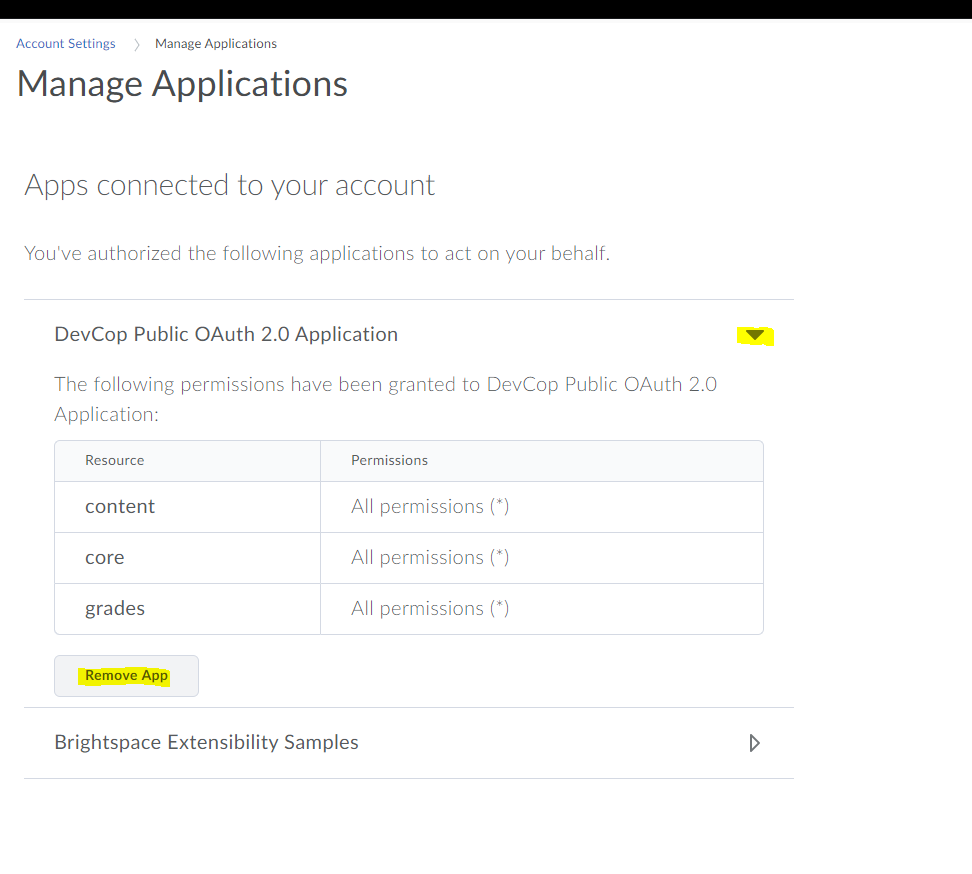
And Click on Manage applications registered with OAuth 2.0 in OAuth 2.0 section.
-
You can see the list of the registered applications and you can expand the application which you want to revoke access to and click on Remove App button to revoke the application access.
Note: If you experience problems with any of the above steps, please contact us via the contact options on sensusaccess.com